How to Add Google Analytics to Your WordPress Site

Understanding the ways that visitors interact with your website is crucial… At least if you’re at all interested in seeing a positive return on the blood, sweat, and code that you poured into the creation of your site. One of the best tools out there for both tracking and aggregating visitor data is Google Analytics, a free resource that brings everything you’ve ever dreamed of knowing about your site to one dashboard.
Before you get started using Google Analytics, you’ll want to check out our brief overview below, where we’ll cover some of the significant benefits it can offer to your marketing strategies. Once you understand how it works, we provide actionable steps for getting it up and running on your WordPress site with our step-by-step guide.
Let’s get started!
What Google Analytics Does
Along with Google Tag Manager and Google Search Console, Analytics is part of a suite tailored to help website owners understand how visitors, search engines, and competitors view your page. It does so by tracking the unfathomable amount of data created every time someone interacts with your business’s online hub.
Data Tracking
It’s almost impossible to list all of the information that the Google Analytics dashboard can track. Most business owners need a few key metrics to improve their online presence and digital marketing.

Those include:
- Number of users
- Number of sessions
- Bounce rate
- Session Duration
- Current active users
- Top active pages
- How users move through your site
- How visitors interact with individual page elements
- Sources of traffic, like organic search, direct, social, referral, etc.
- Where users are by country
- What time users visit
- Pageviews ranked by frequency
- Sessions by device
- Active user trends over time
- User retention rates
All of this data can be summarized and grouped into three key “hit types:”
- Pageview hits, which occur when someone visits a page of your website.
- Event hits happen when someone does an action on your website, like clicking a link or closing a pop-up landing page
- Transaction hitsdata is created when someone purchases a product from your website
Data Analysis
When you code into your website, it uses cookies to gather information about each visitor who stops by. Because each cookie is unique, this tool can compile the raw data into more digestible insights based on individual users and individual sessions.
Valuable Reporting
Once the cookies have gathered data for the length of time you’ve set, Analytics aggregates it into a report that populates your dashboard. The dashboard provides visual representations of the data in the form of color graphs and charts.
Site owners can use the pre-set dimension (qualitative) and metric (quantitative) reports or create their own for further customization.
Installing Google Analytics on Your WordPress Site
- Sign up for yourGoogle Analytics account. Click the “Start for Free” button.

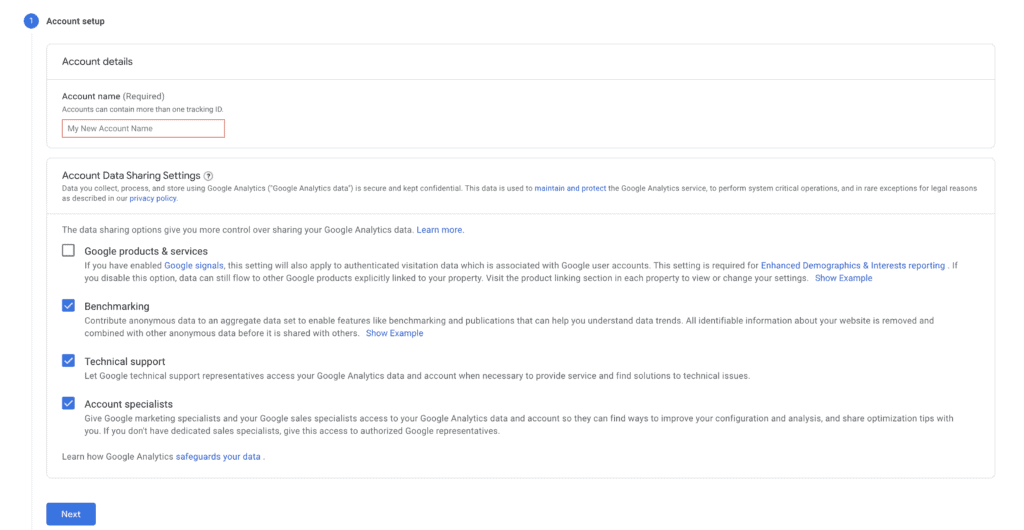
- Add your account (website) name and decide which data sharing options you allow Analytics to access. The more options you check, the more data you have access to.
- Give the property details. Type your website name, reporting time zone, and the currency you use for e-commerce.
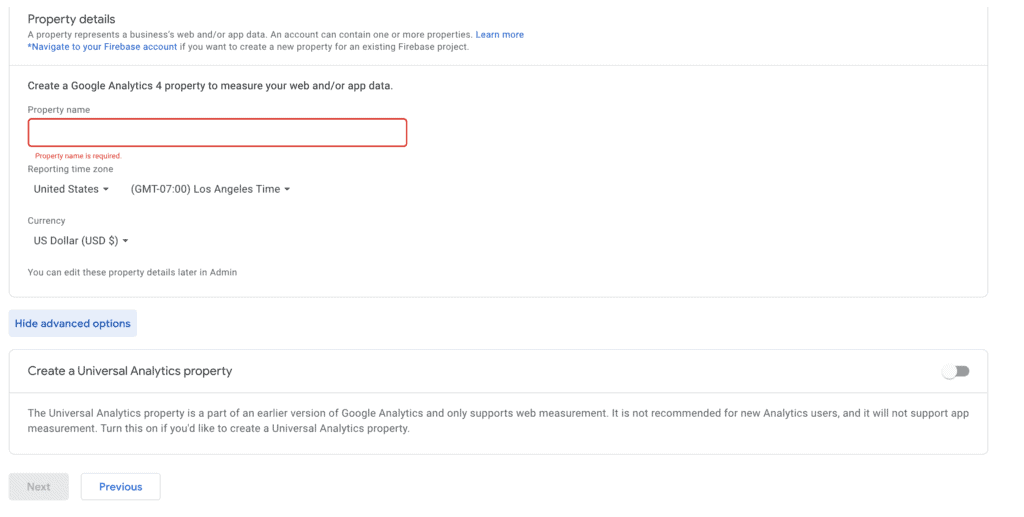
- Click “Show Advanced Options,” which opens up the option to create a Universal Analytics Property. While this is not the latest update to Google Analytics, there are currently several known conflicts when installing the updated GA-4. We’ll post a tutorial for this method in the coming weeks.
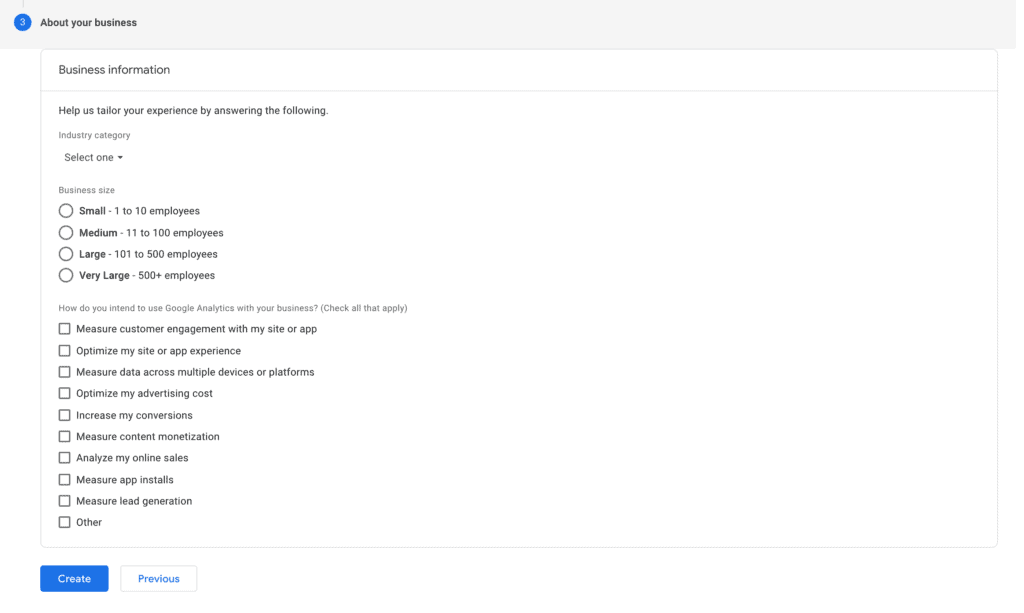
- Give information about your business, including industry category, business size, and how you intend to use Google Analytics.
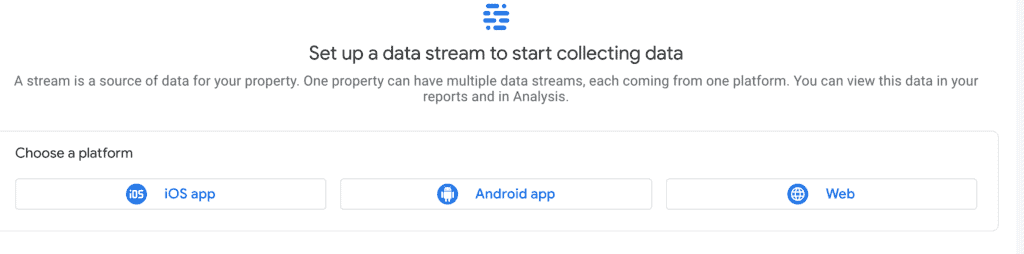
- Choose which type of data stream you’d like to track. We’ll use “Web” for our example.
- Once you’ve created the data stream, you’ll be taken to a list of all streams you’ve set up. Click the stream you need the code for, which brings up a new menu.
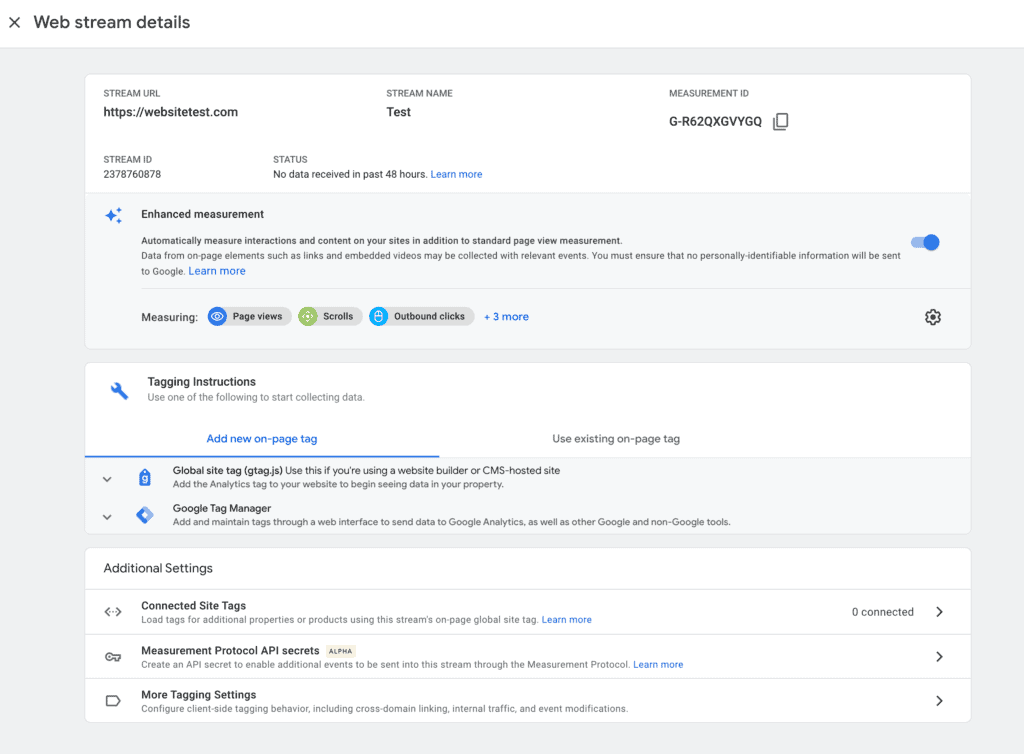
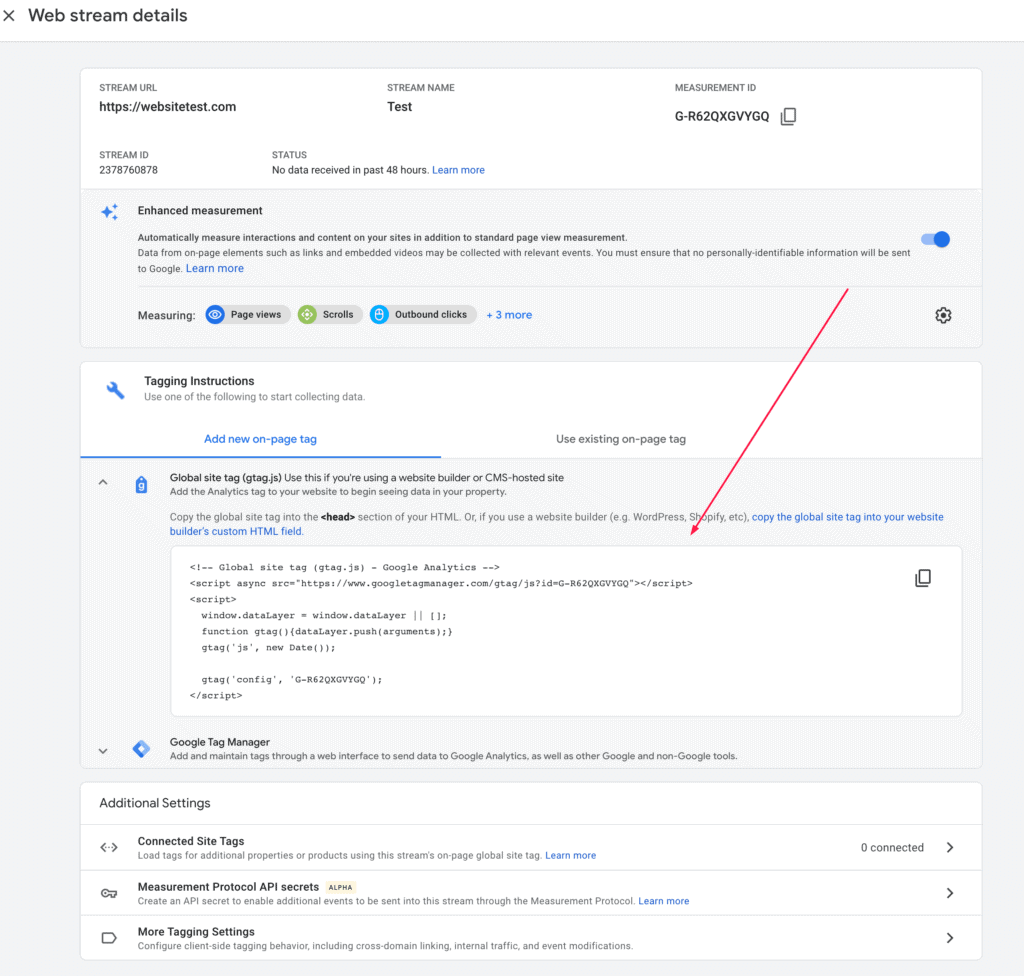
- Find the menu with the wrench icon, titled “Tagging Instructions.” Then, select “Global Site Tag.” This populates the page with a unique HTML tag for you to implant into the code on your WordPress site. Copy the text.
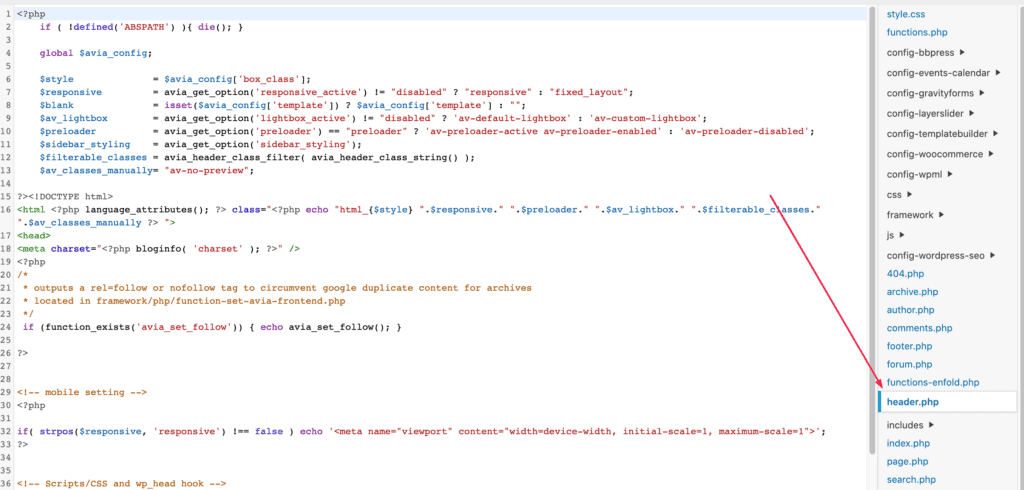
- Login to your WordPress site, then navigate to Appearance > Themes> Theme Editor.
- Find the “header.php” file and select it.
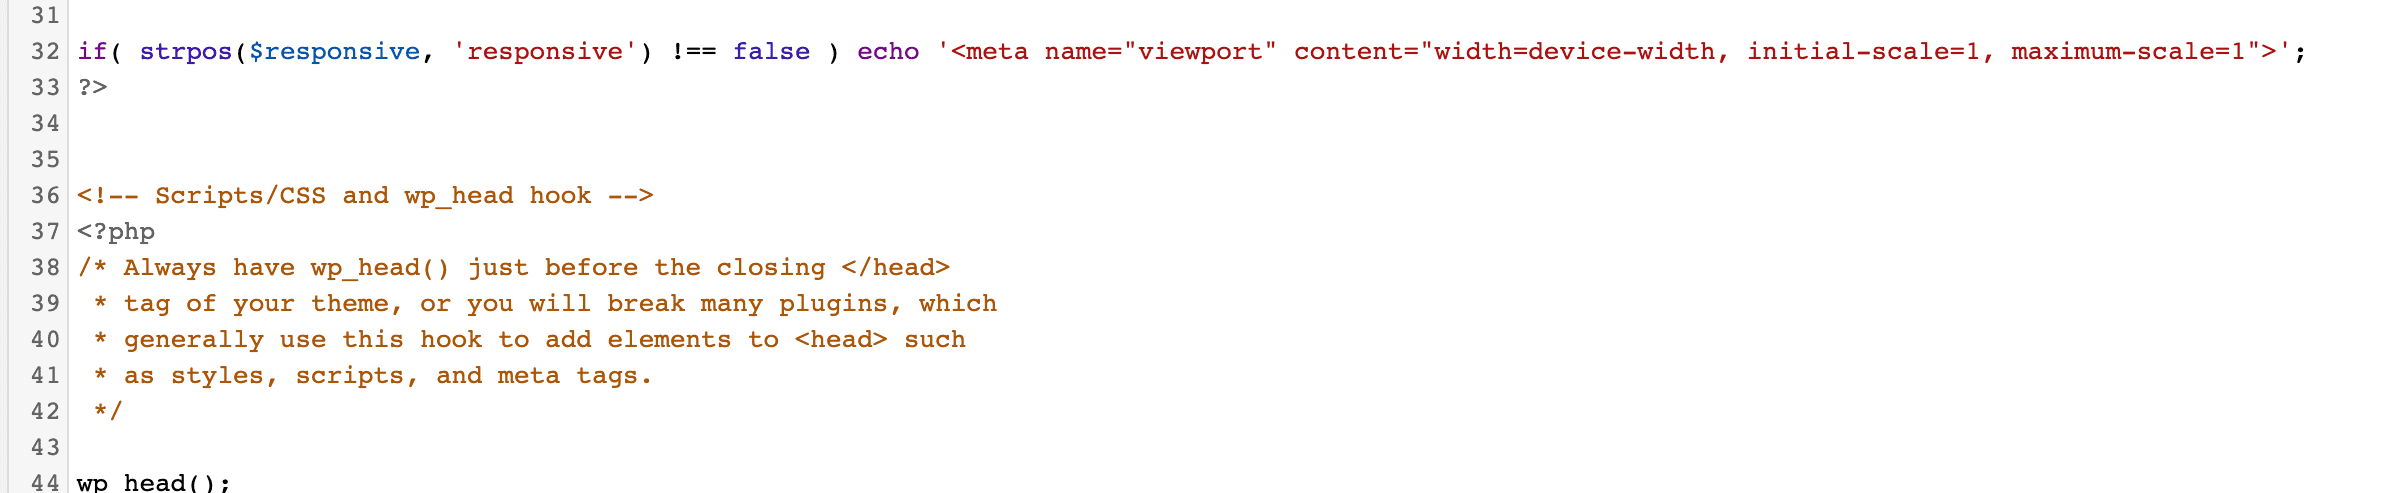
- Paste the HTML code you copied from Google Analytics into the code at some point before the closing </head> code. Be sure to hit “Update File” at the bottom, then you’re ready to track!


After this point, it’s not uncommon for it to take up to 48 hours for the data to start populating your Analytics Dashboard.
Let the Digital Marketing Pros Help with Your Data Analytics
While the process for installing the Google Analytics tracking code is simple enough, knowing what to do with all of the data is a whole different ball game. Without a solid strategy in place, all of the rich information about your website and its visitors is useless.
NATIV3 has two decades of experience honing in on data insights and leveraging them to help you see higher returns from your site. Let us help your business take advantage of all the marketing information Google Analytics has to offer. We can tailor your entire online presence to address the specific wants and needs of your customers. It’s an investment in your business’s digital future that’s too important to pass up.