How To Verify Your Web Domain With Facebook

As part of Facebook’s move to mitigate the damage to small business advertising that iOS 14 is predicted to incur, the social media platform is now requiring businesses to register their web domain to access critical business suite features.
In a recent article on the topic, Facebook said, “As more people opt-out of tracking on iOS 14 devices, ads personalization and performance reporting will be limited for both app and web conversion events. A key impact of this change is that you’ll be limited to the use of 8 conversion events per domain for optimization and reporting. Domain verification establishes which Business Manager account has the authority to configure and prioritize the 8 available conversion events for a given domain.”
Essentially, that means that Facebook is reducing the number of pixel events a web domain can configure to “play nice” with Apple’s AppTrackingTransparency framework, which will allow small businesses to maintain some semblance of the data tracking they had before the new iOS rollout.
Verifying your domain takes place on the backend, using a special piece of code that helps ensure the veracity of your association with the said domain. In turn, Facebook will allow verified businesses to overwrite link metadata when creating link page posts back to their owned sites. This is a valuable feature and one that is worth dealing with the small task of embedding the verification code onto your site.
We’ll walk you through the step-by-step, as recommended by Facebook:
Web Domain Verification Options
Depending on your personal preferences, you have a few choices for handling your domain verification. Those include:
- Adding a DNS TXT entry to your domain’s DNS record
- Uploading a Facebook-provided HTML file to your web directory, then confirming domain ownership through the Business Manager.
- Adding a metatag to the <head> section on the home page of your domain.
You only need to choose one option, NOT all three!
Add Domain in Business Manager
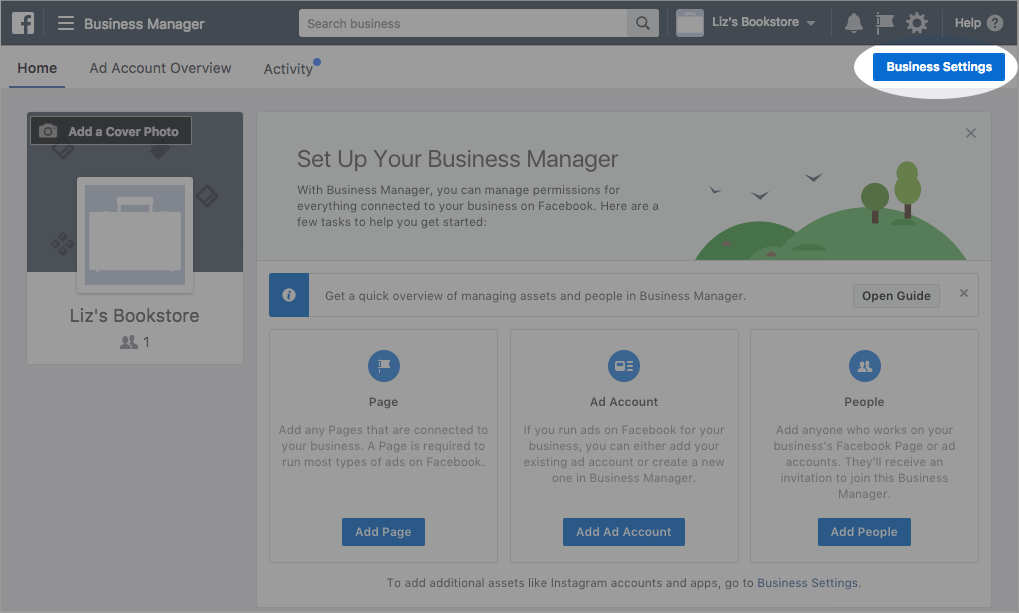
- Navigate to Facebook Business Manager, then select the “Business Settings” on the left-hand menu.
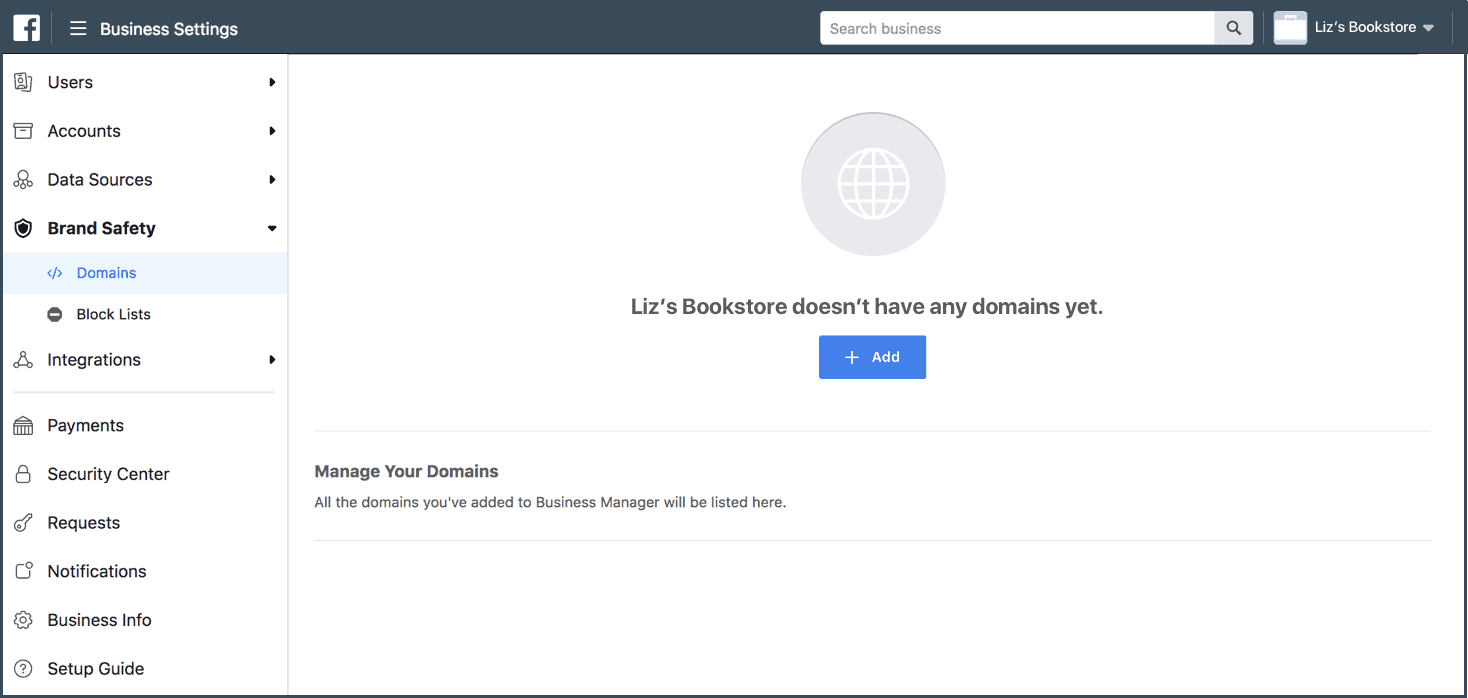
Source: Facebook for Developers - Using the “waffle” menu, click the Brand Safety option, then select Domains.
Source: Facebook for Developers - Click Add and enter your domain in the pop-up box. If you have more than one, you’ll have to select the domain you are currently trying to verify.
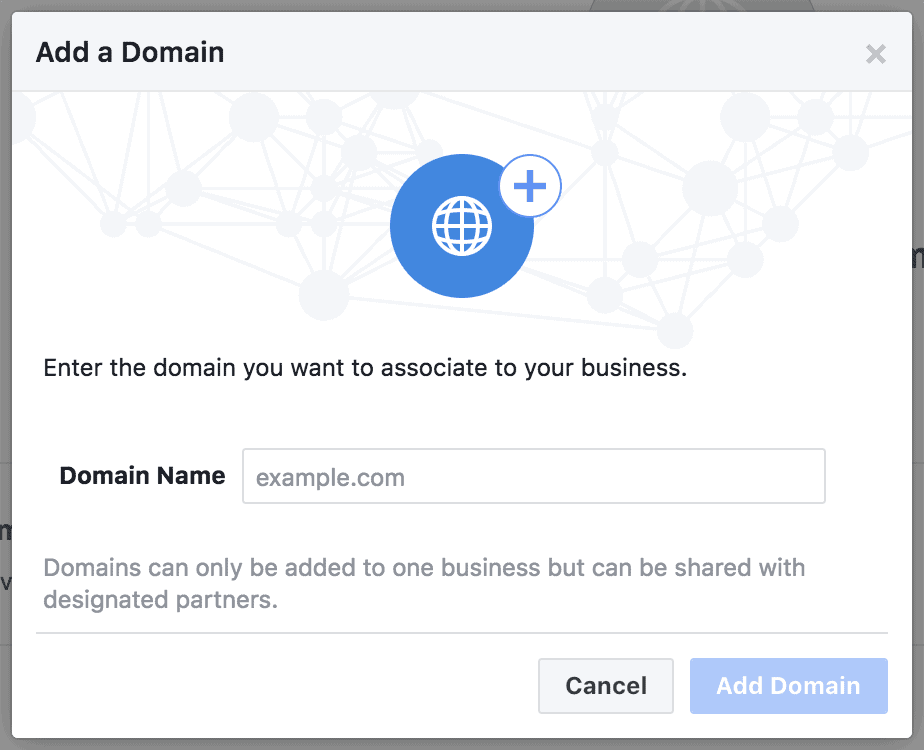
Source:Facebook for Developers
DNS Verification
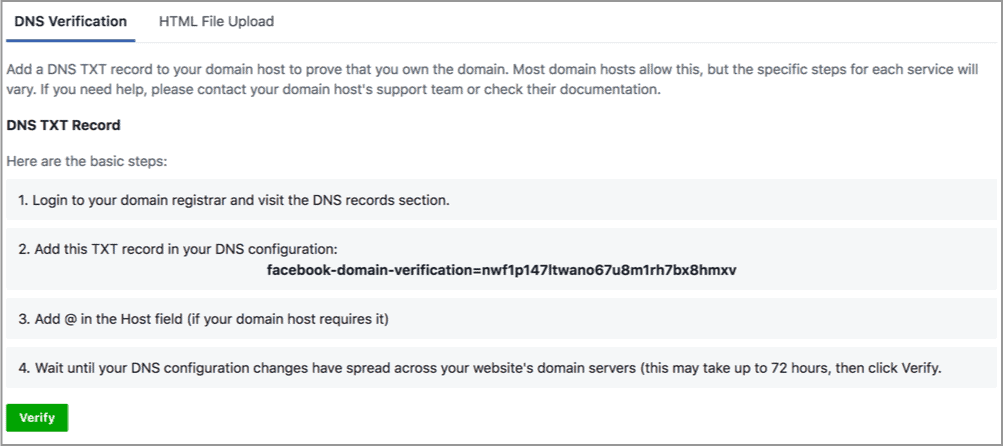
- When you select your domain through the Business Manager, click the DNS Verification tab to locate the TXT record you need to complete this particular option.
- Add the TXT entry to your DNS record, and if required by your domain host, add @ to the Host field.
- Once all changes are complete, click Verify at the bottom of the DNS Verification tab to complete the process. While most domains are verified in moments, it can take up to 72 hours.
Note that you should not remove the TXT entry from your DNS record. This allows Facebook to periodically re-verify your domain in the future.
HTML Verification

- Select the HTML File Upload tab.
- Download the Facebook-provided HTML file.
- Upload this file to your website’s root directory. The HTML File Upload tab will populate with a link that you can use to verify that the file is uploading.
- When the process is complete, click Verify at the bottom of the tab.
Just as with the DNS verification, you should leave the HTML verification in your root directory.
Metatag Verification
- Select the Meta Tag Verification tab.
- Add the meta tag that contains your unique verification code to the HTML <head> section of your domain’s home page.
- Confirm that the new meta tag is visible by viewing your home page’s HTML source.
- Click Verify at the bottom of the tab.
Of course, leave the verification meta tag in place for future verification spot-checks performed by Facebook.
If those processes are unfamiliar to you, you don’t host your website’s domain, or you would rather leave this process in the hands of the experts, get in touch with NATIV3. We’ve helped dozens of clients navigate the ends and outs of the digital world, along with the constant flux of rules, regulations, and expectations. We can help you too!