How To Add A Date Picker To Your Leadpages Forms

If you’re reading this, chance are you are trying to get date picker on date field on a landing page you built on Leadpages. You probably find it as baffling as I did that the date picker functionality doesn’t come through by default on your landing page. Nevertheless, we’ve outlined 3 steps for adding a great looking date picker field to your landing page forms on Leadpages.
*Note: Although we discuss using Mailchimp throughout this post, steps 2-3 will work with any CRM integration you choose.
The Problem
You’re creating the next big thing in capturing leads, and decide you want to provide a date field so that your leads can note their preferred time for you to reach out to them. Using Mailchimp as your lead collection tool, you go there first and create your form, including the date field. Checking the form preview, everything is good so far: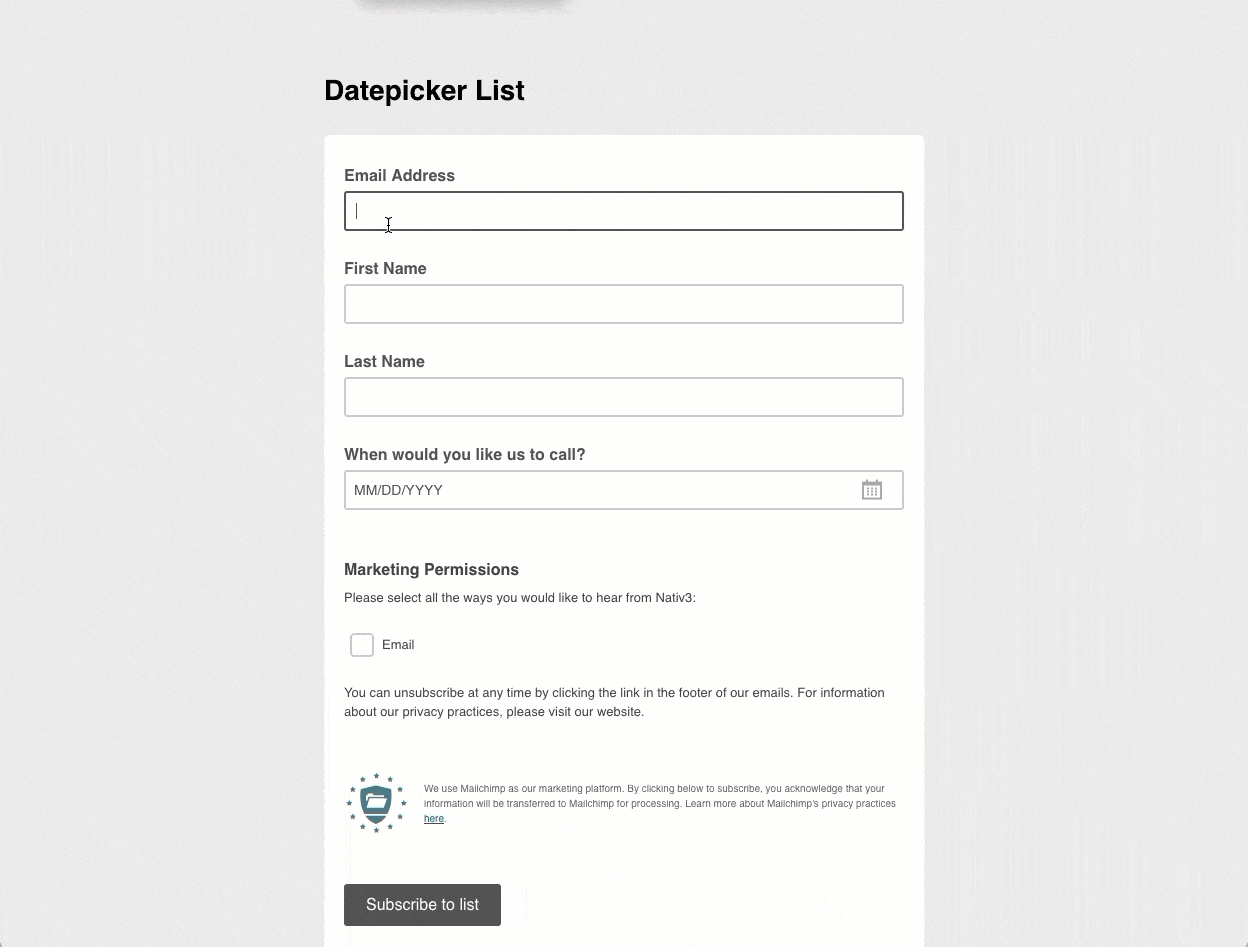
However, when you integrate the form over at Leadpages, and check the page, you find that the same nifty date picking functionality doesn’t work. The problem here is that if your lead doesn’t add the date in exactly the right format, they’ll be presented with a not-very-helpful error message.
Of course, you could change the error message to tell them exactly what to do, and while it would be more helpful than the default error message, it would still qualify as a “Norman door” type field. This is why date pickers exist — to standardize the data we take into a form. There has to be a better way.
When we first encountered this problem, of course the first thing we did was search on Google for “datepicker mailchimp form leadpages”, and after looking around at the dismal search results for a while, we realized that Leadpages has apparently either not recognized this as a problem or decided not to address it. We haven’t done any testing to determine if this problem exists with other form integrations on Leadpages, but assume that it does based on some of the search results we’ve seen in Google.
The Solution
The solution for this is to use some some Javascript and manually create the functionality you need. It’s not difficult if you know how to do that, or, if you have some instructions. Hopefully, this post will help those of you who need it.
In order to follow the steps below, you just need to tap into the jQuery library and provided by jquery.com. We’ll give you the code snippets you need below.
1. Prepare your form
The first thing you’ll need to do is go back to your form on Mailchimp and remove the date field. You may want to hide this field if you’ve already got contacts in this list, as deleting the field will also delete the data on existing contacts (don’t say we didn’t warn you!).
Replace that date field with a simple text field, labeled the same as your date field. Feel free to add some help text if you’d like. After you finish making your changes, click “Save Field” to save your changes.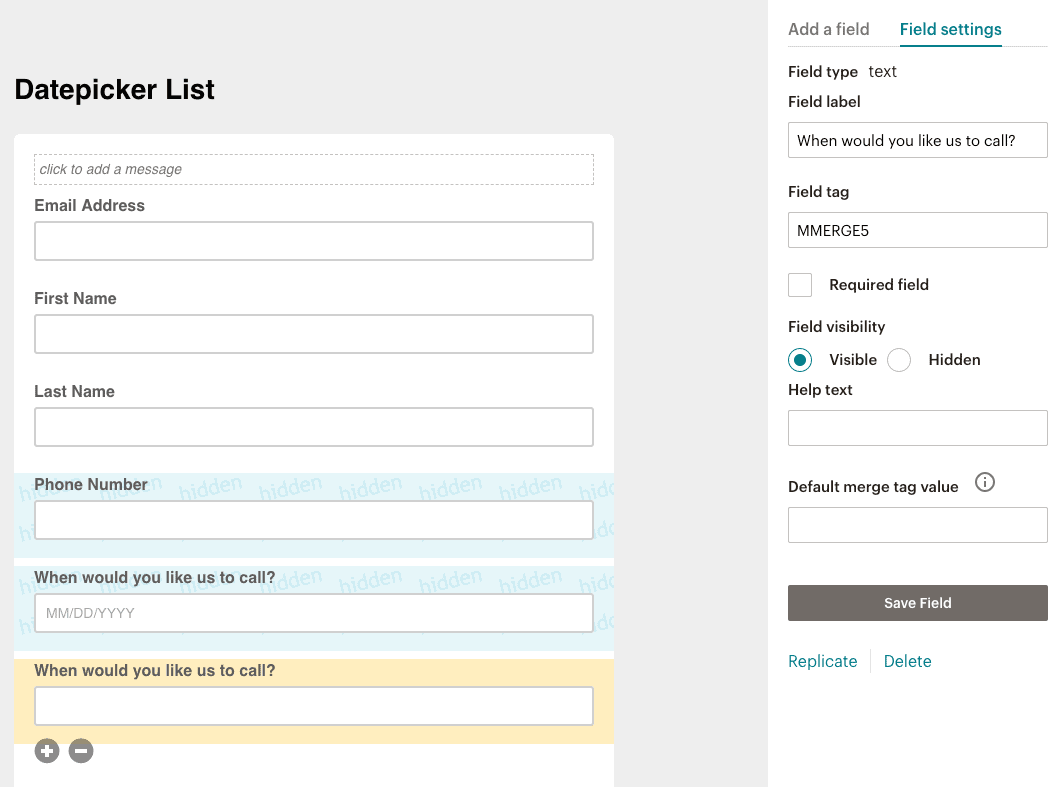
2. Update your form on the landing page
To do this, you’ll need to make sure you complete the step above first, and then navigate back to your landing page. Refresh the page if you’ve already had it open. Then, use the “Refresh List” button to refresh your Mailchimp form.
After refreshing your form, click next to edit the fields. Remove the old date field and then add the new “text” field that will serve as our date field. The click through to save your field changes.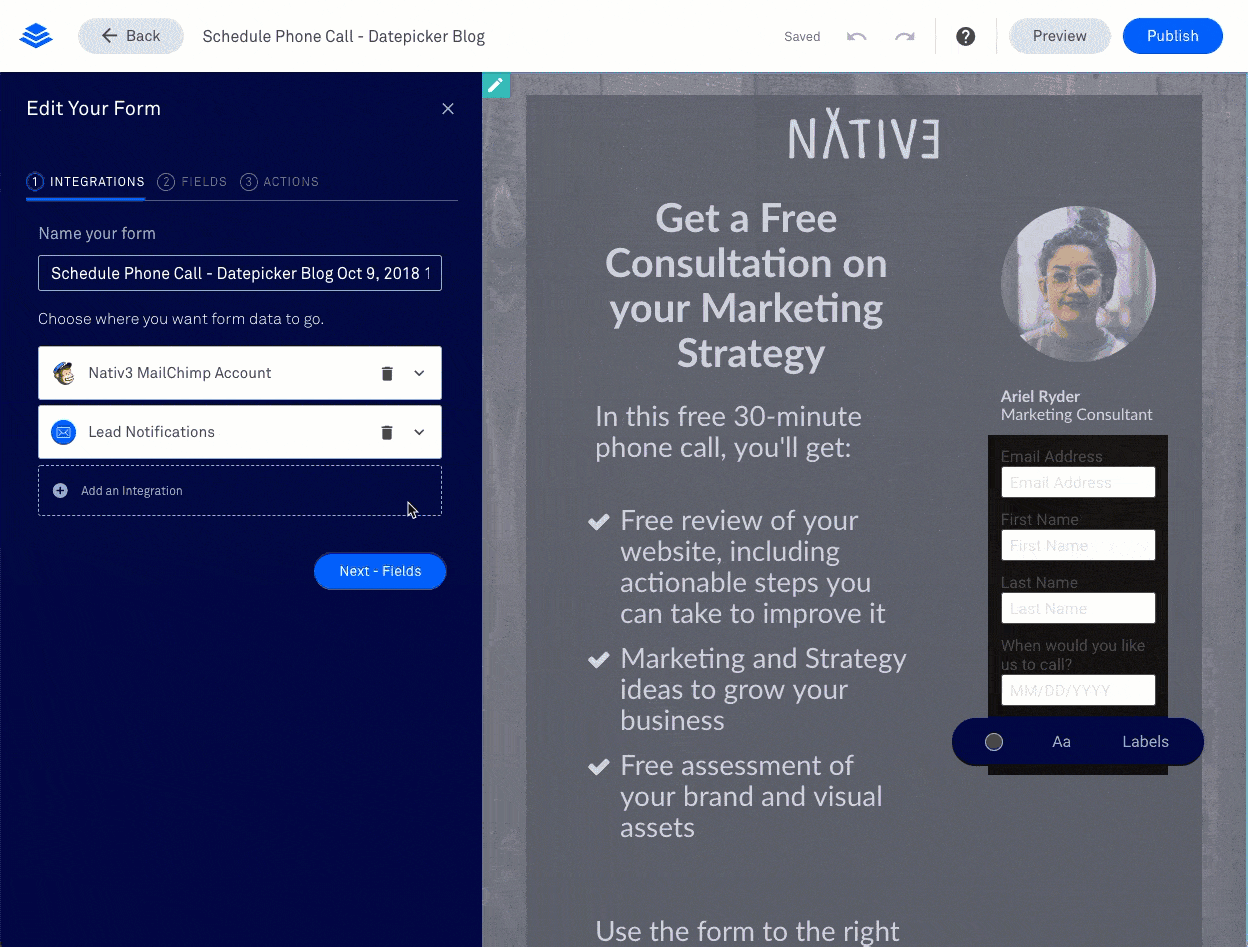
3. Add jQuery to the page
Finally, we’re going to add some jQuery to the page to target the text field that we created and cause a date picker to pop up when a user clicks into it.To target the field, we need a unique identifier from the field. We can find this in the inspector of your browser. You’ll need to publish and view the live landing page to do this. On the live page, right-click on the date field and click “Inspect.” Your inspector will open up and the code for that field will be highlighted. Look for the ‘name=’ attribute, and copy everything between the double-quotes after the equals sign.
Now that you have the name, we can add the following code to the page to create our date picker. Documentation for code we are using can be found at The jQuery Foundation. We are using some additional features of the date picker to restrict weekends and dates prior to the current date.
<!-- Date Picker-->
<link rel="stylesheet" href="//code.jquery.com/ui/1.12.1/themes/base/jquery-ui.css">
<script src="https://code.jquery.com/jquery-1.12.4.js"></script>
<script src="https://code.jquery.com/ui/1.12.1/jquery-ui.js"></script>
<script>
   $( function() {
      $( '[name="######"]' ).datepicker({
         beforeShowDay: $.datepicker.noWeekends,
         minDate: 1
   })});
</script>
You will be placing the code above in the head section of the page. This can be found in the “Analytics” settings on Leadpages. Simply copy the code above and paste it below any other content in that section of your page. Replace the “######” in my code above with the name attribute you grabbed in the previous step. After making your changes, save the changes and then click “Update” to update your page.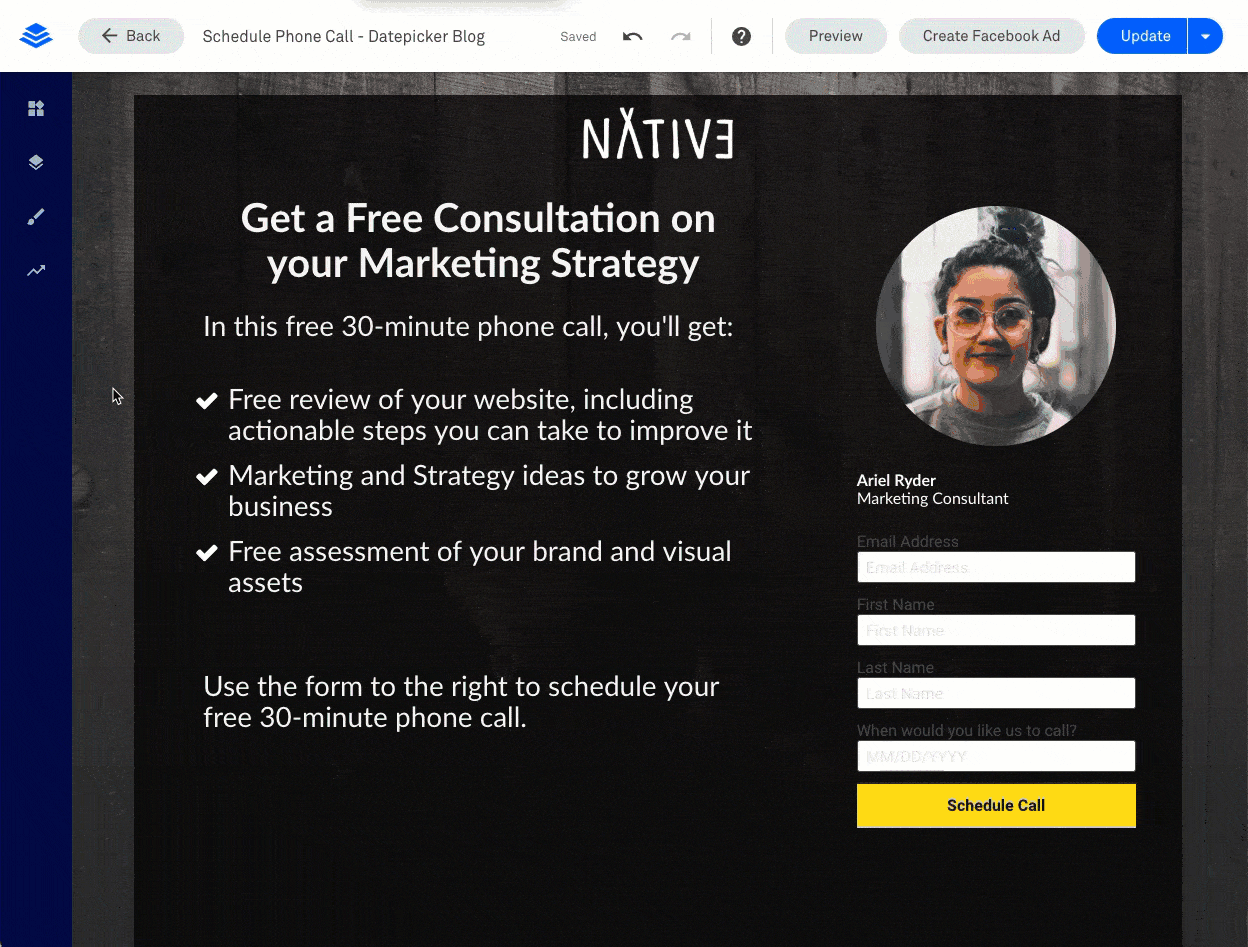
That’s it! When you refresh your live page, you’ll now have a date picker on that field, making it super easy for your lead to let you know when to call.