Facebook Marketing 101: How To Set Up A Business Account

With a Facebook Business Account, you can unlock features not available to the everyday user. In fact, if you’ve been using your personal page to advertise for your business, you’ve already got a pretty good handle on what using your business page is going to be like.
Working with social media sites can feel a little overwhelming, so we wanted to help you out by breaking down the process of creating a Facebook business account into 7 easy peasy steps that will launch you from advertising to Aunt Augusta and her bridge club to truly tapping into your intended audiences. Let’s get started:
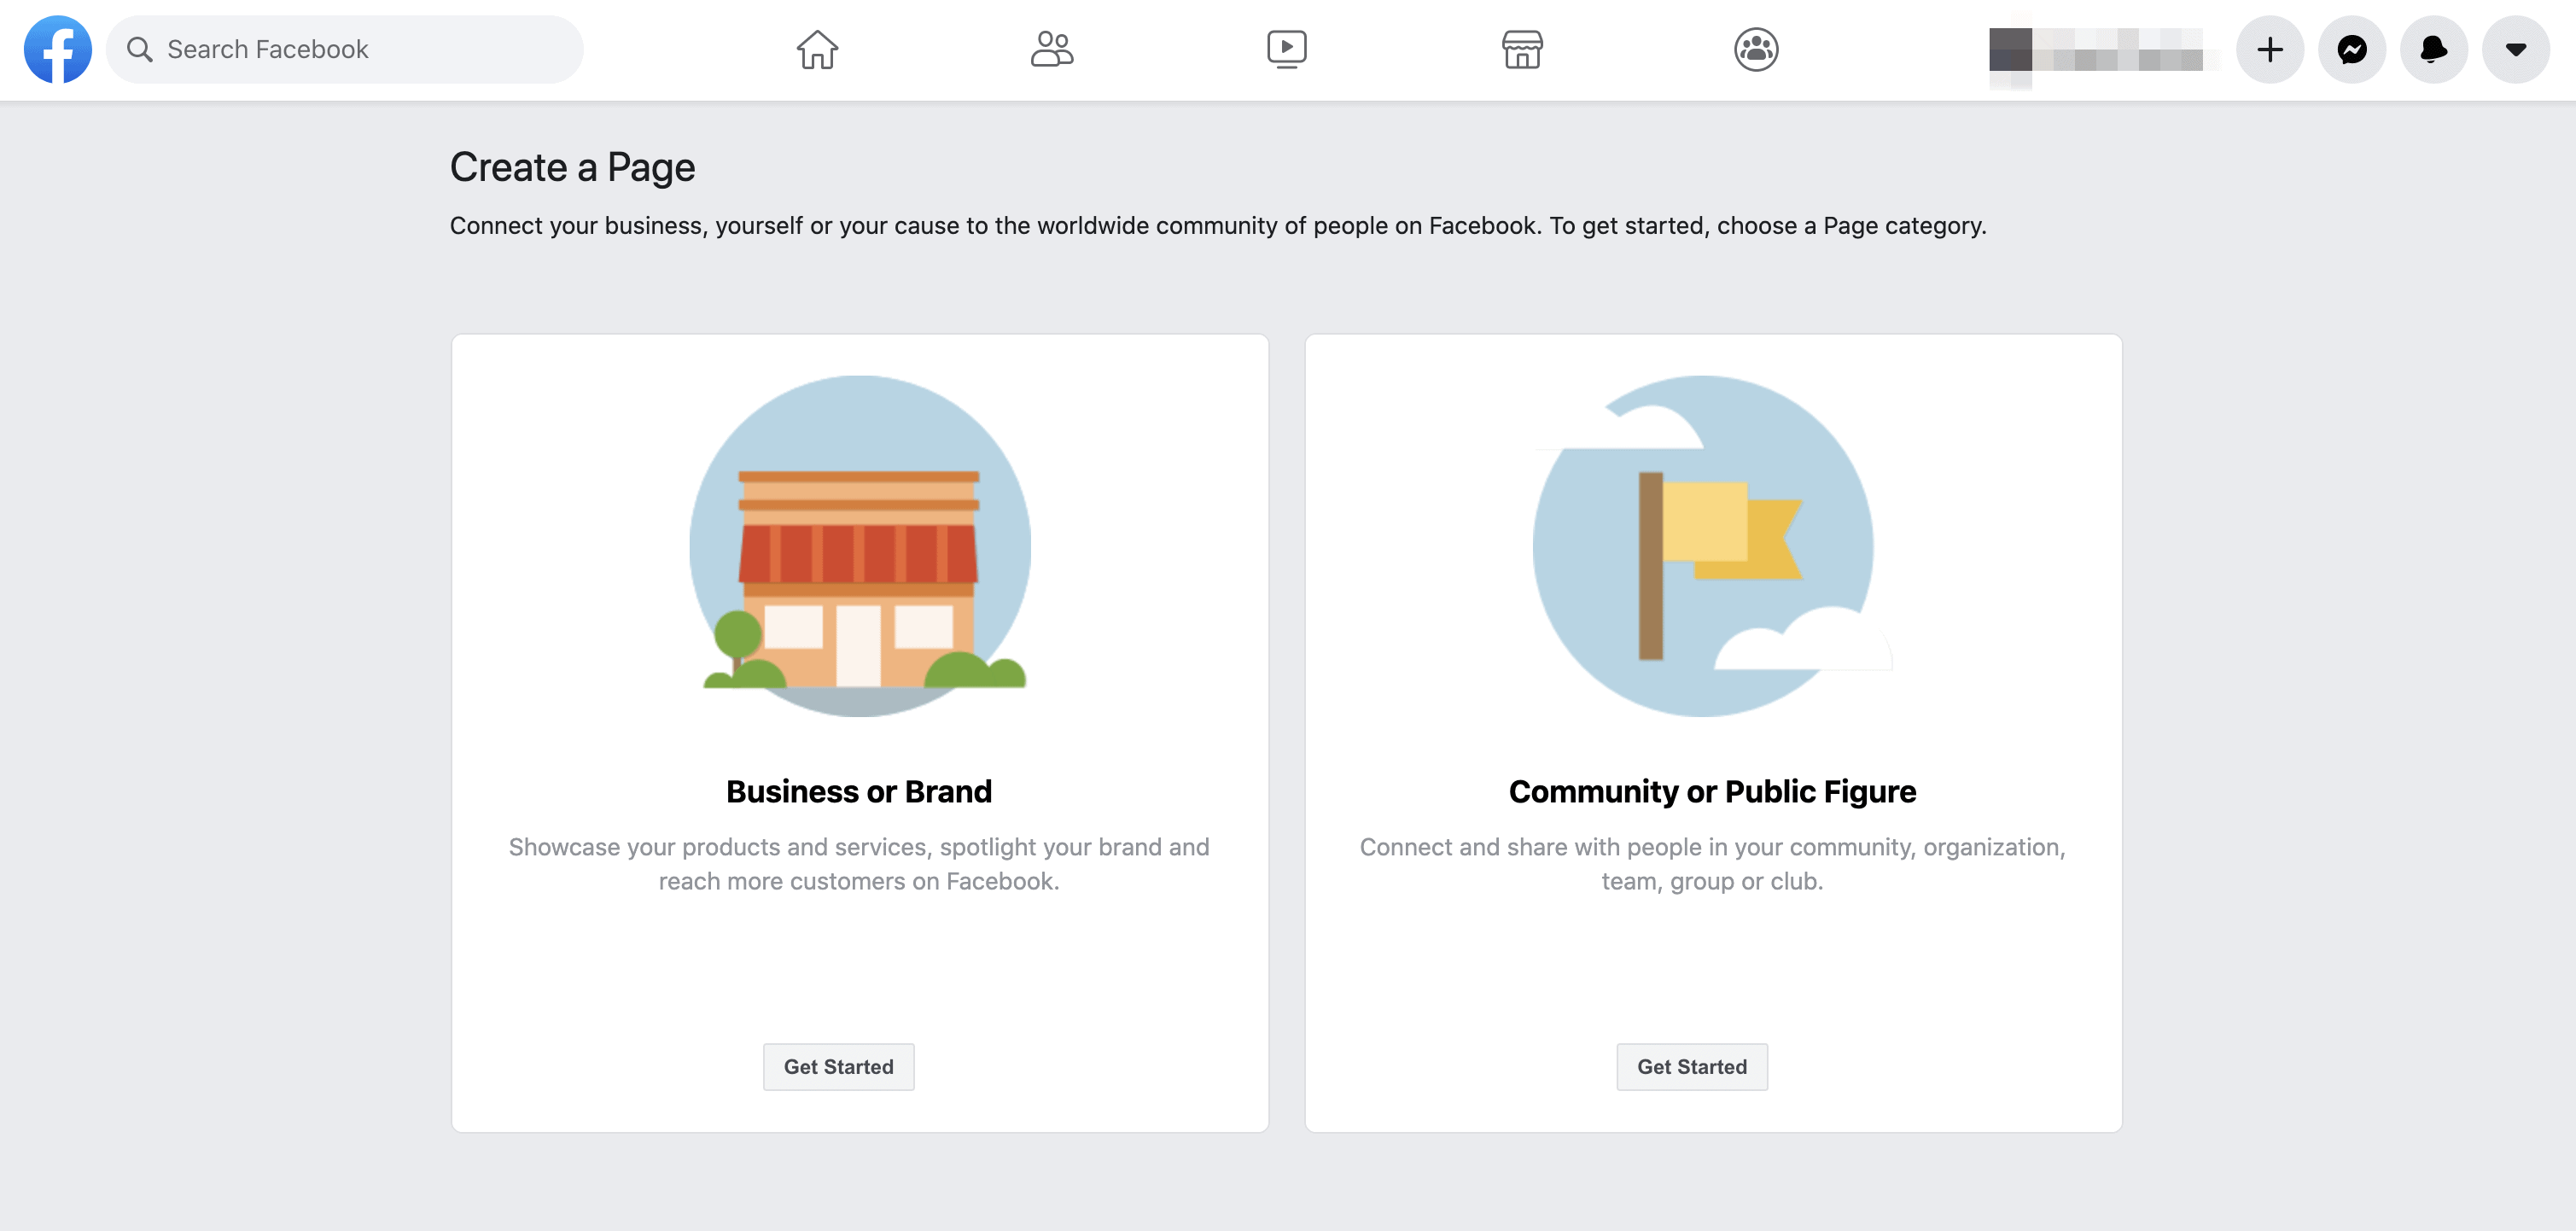
- Head over to facebook.com/pages/create. You’ll be prompted to choose if you want to make a business/brand account or a community/public figure account. In this case, you’ll choose the first option.
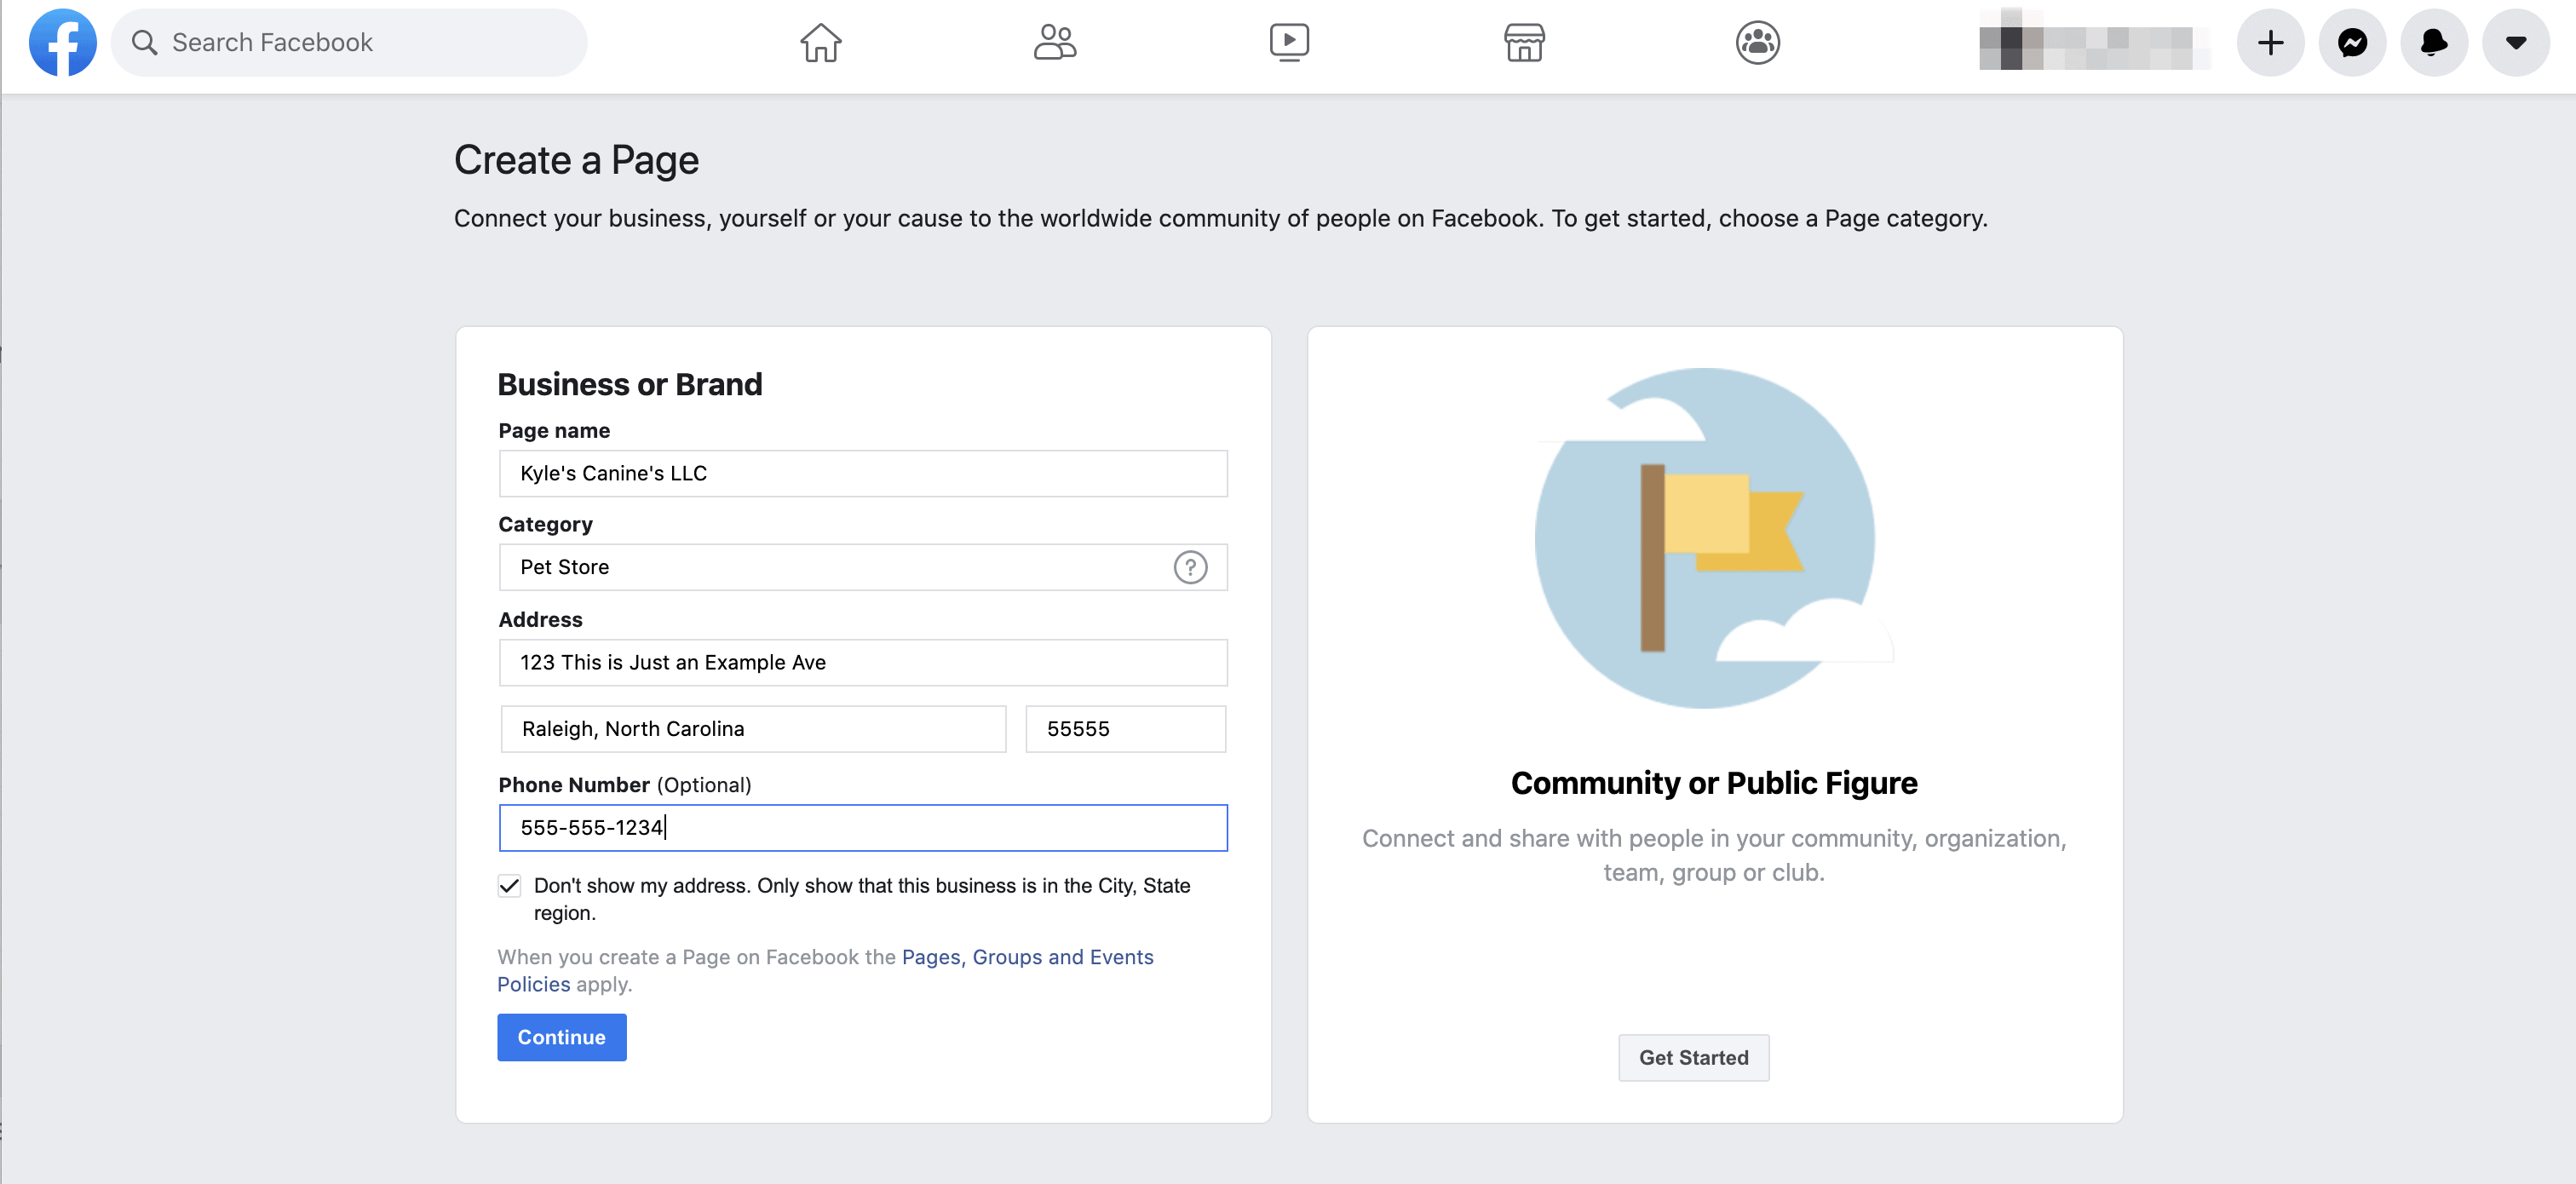
- Add the name of your page and what category it falls into. The name should be the name of your brand. For category, think about the industry that your business is based in. For example, if you own a local pet shop, you may want to choose “Pet Store.” You’ll then be prompted to add in your address and your phone number. This information will be visible to customers, so if you’d like, toggle the option to only show your city and state.
- Next up, photos. The first picture you upload will be the image that shows as your main profile picture. This should showcase something about your business. Many opt for a logo or a shot of their store front. Next, you’ll choose your cover photo. This one will show at the top of your Facebook business account when people visit your page. Once you submit both photos, you’ll be taken to your official business page.
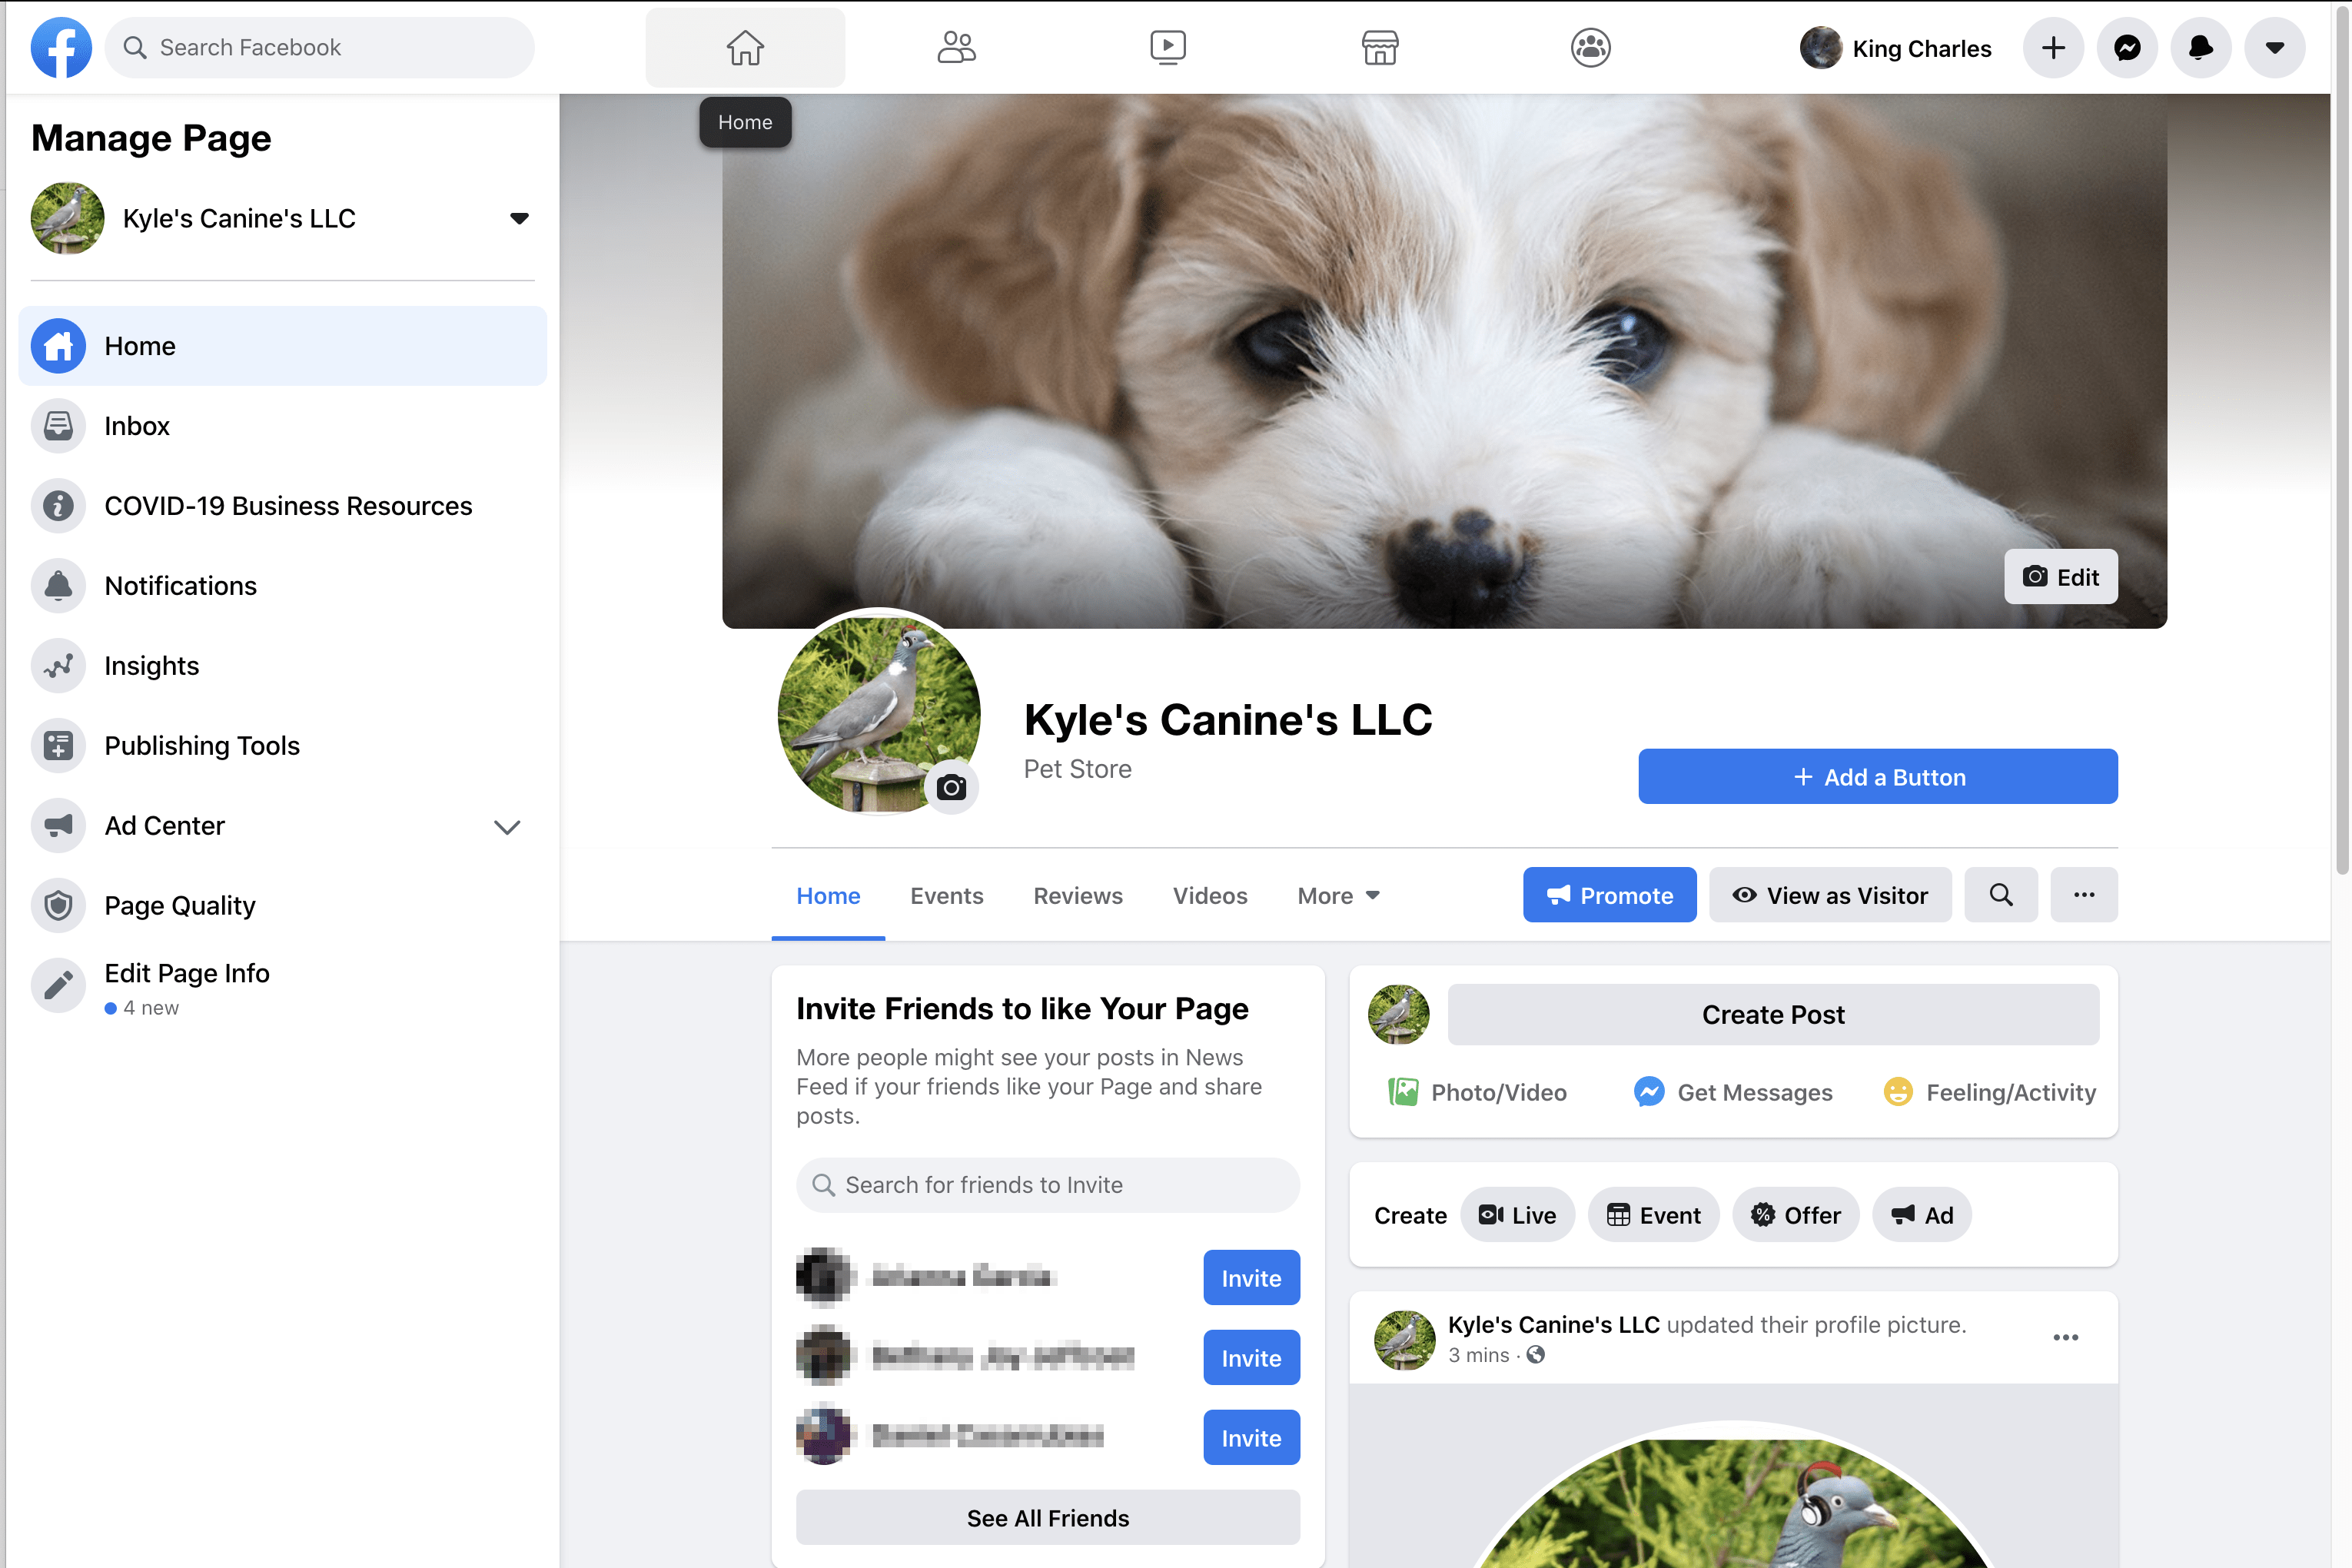
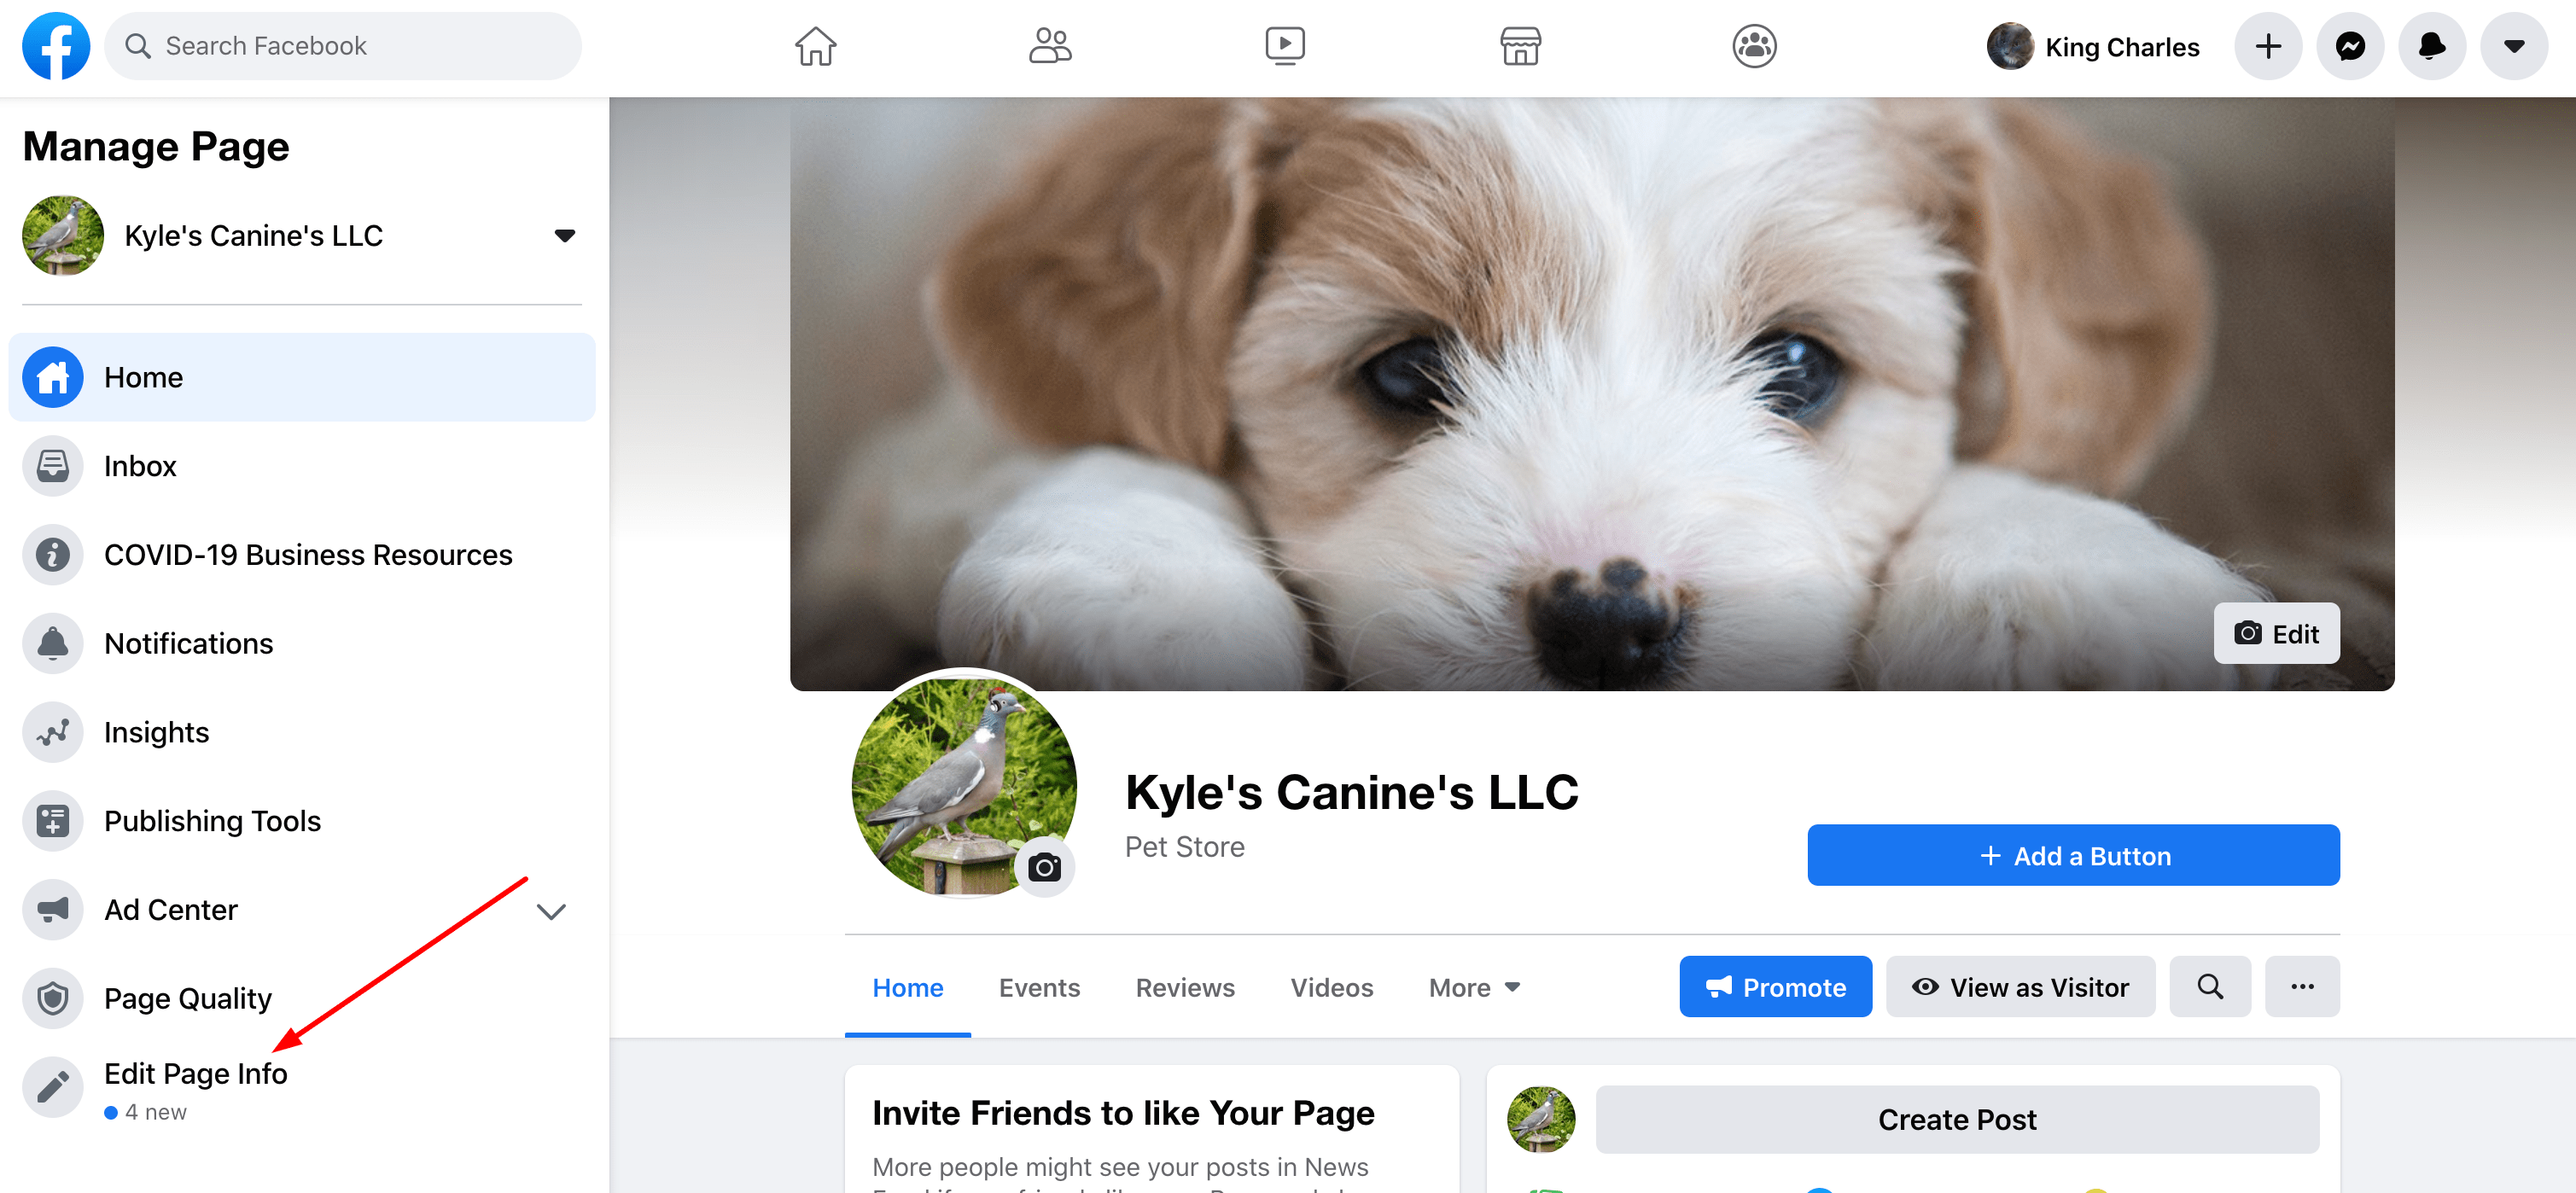
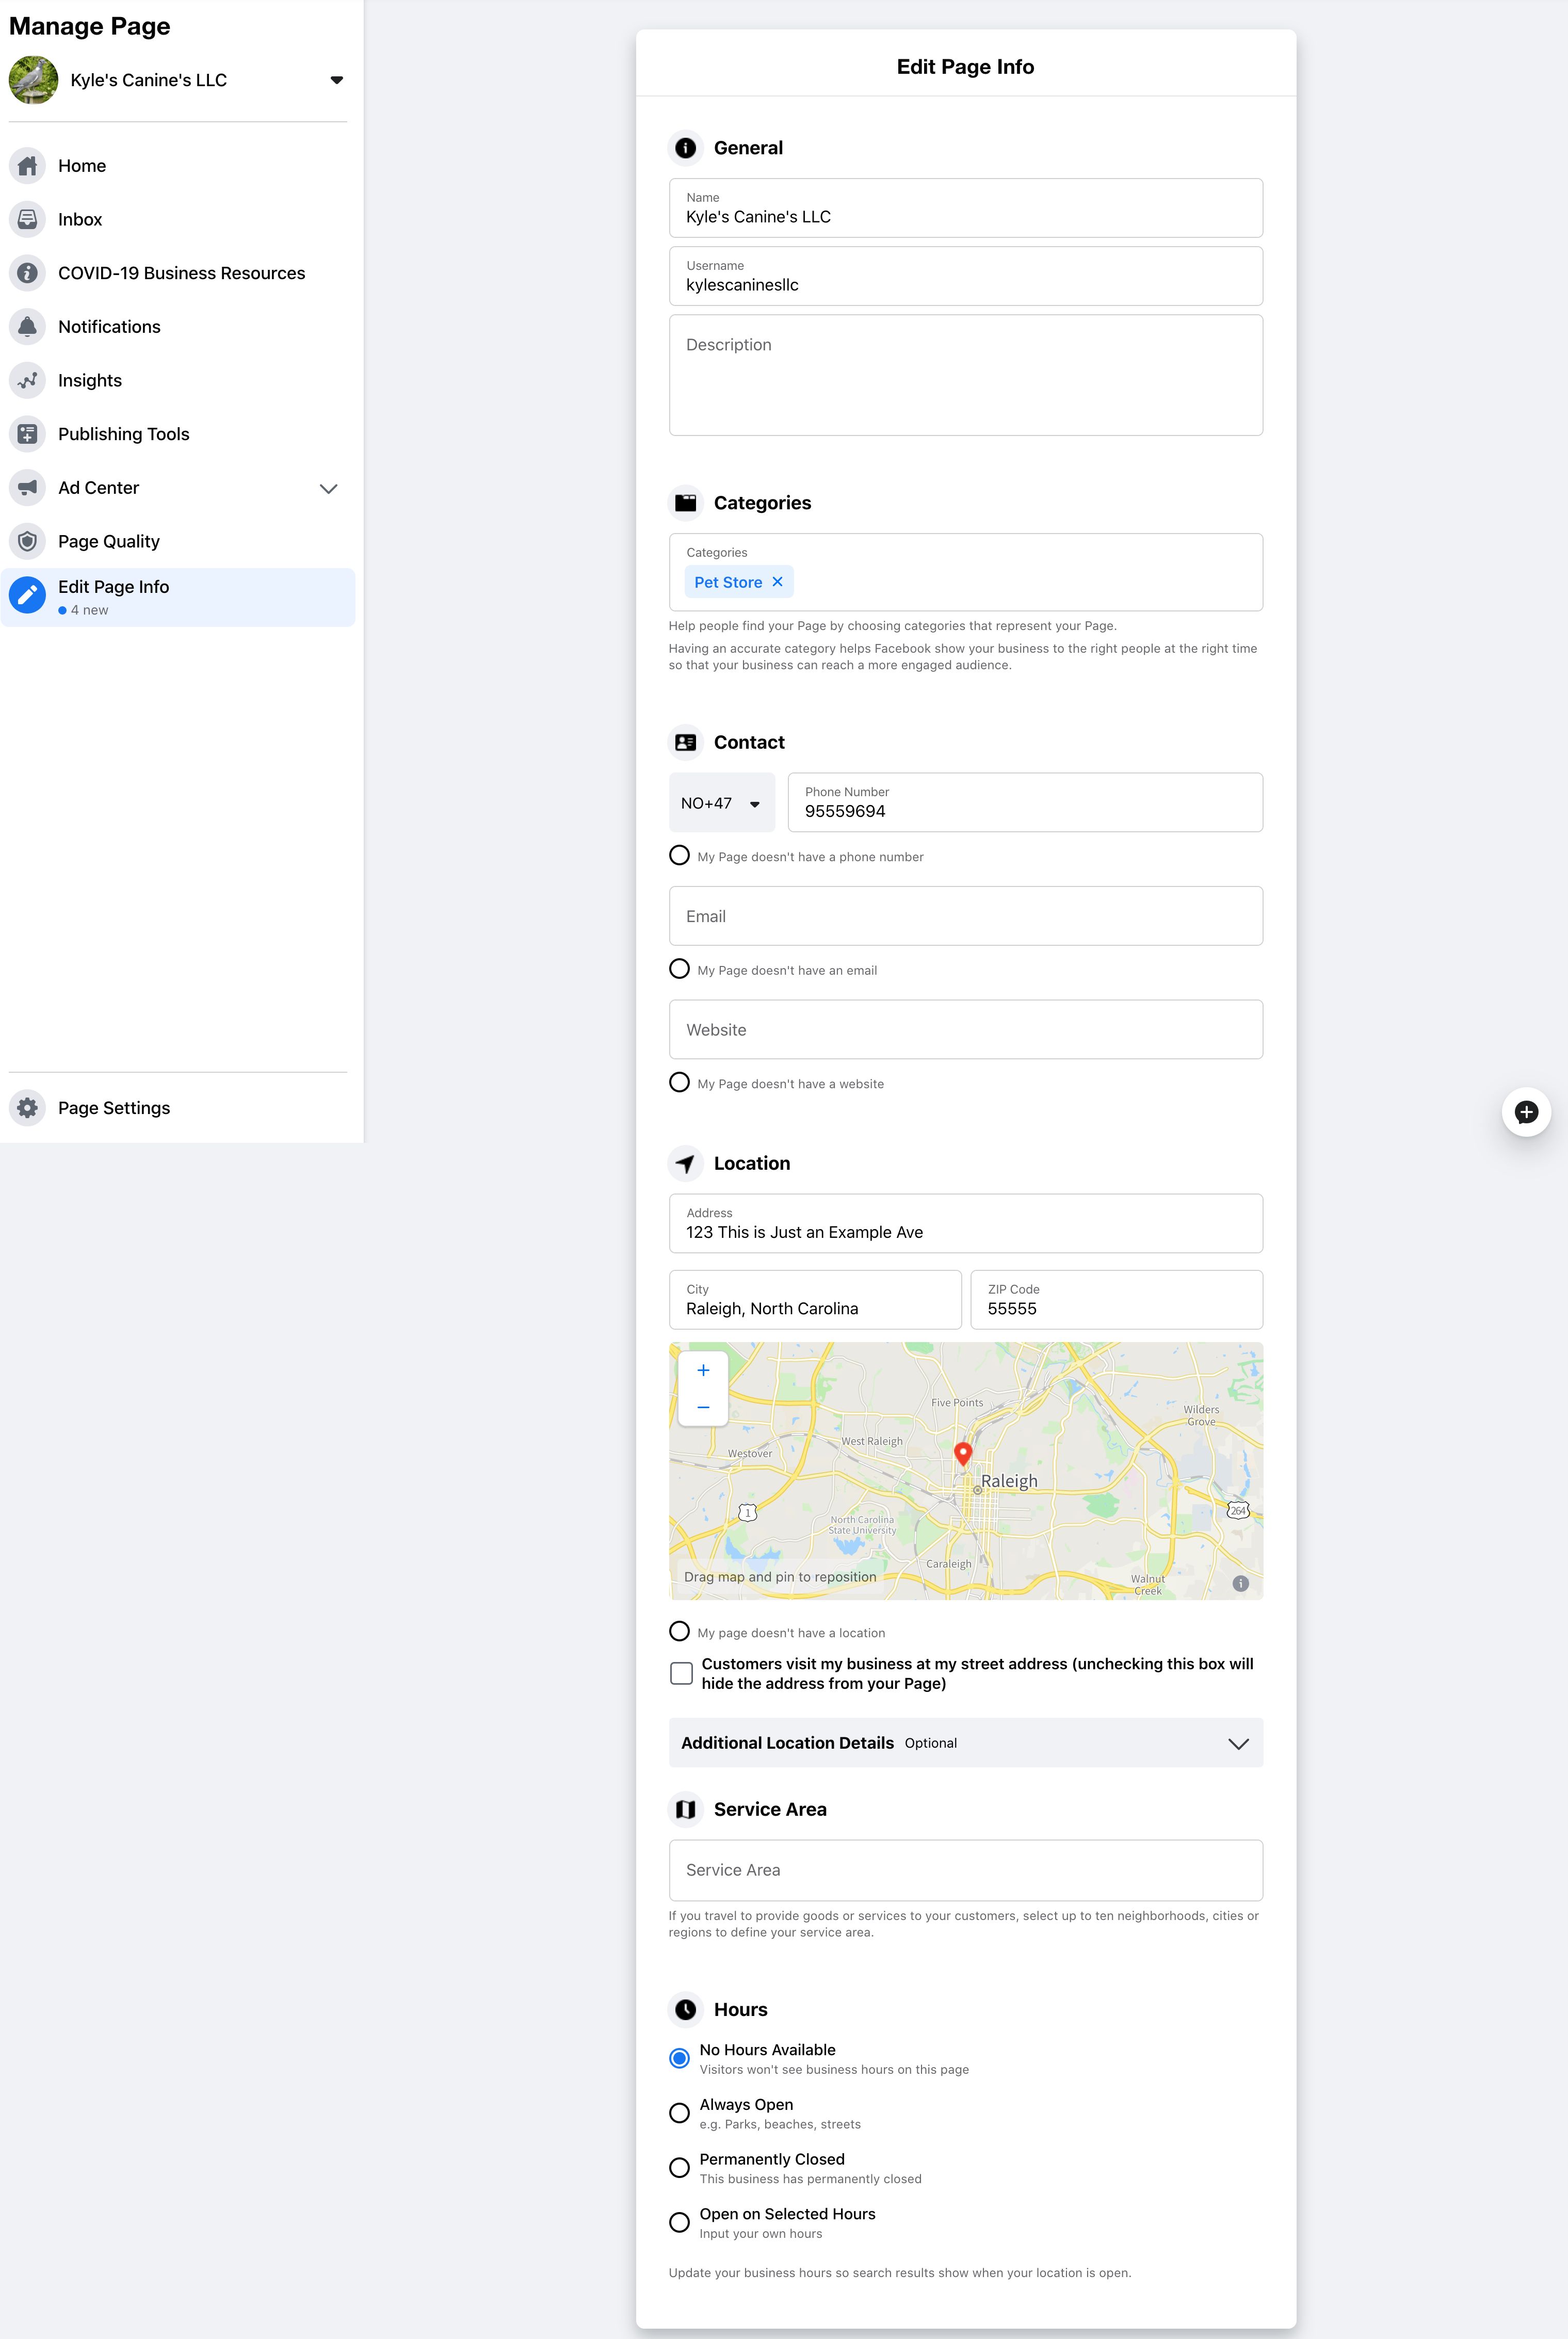
- We’re already halfway done! Next, we’re going to start customizing your page to better reflect your brand. On the left menu, at the very bottom, there’s an option edit your page info. We’ll head here to make some changes.
- Choose a username. This will be your business’ custom url. For our imaginary pet shop, it would be www.facebook.com/kylescaninesllc. Not only does this reassure your customers that your page is legitimate, it also makes it a whole lot easier to find you amongst the absolute mobs of pages that exist on Facebook.
- Start filling in the skeleton of your page. Starting with the description, give just a couple of sentences that describe what your business is. If you’d like to add additional categories, to make yourself more available to a wider audience of searchers, you can also add those here. You can also edit your contact details, if necessary, and add in your store hours.
- Create your first post! Your posts are going to be the heart of your social media presence… You’ll be using your business account to advertise, respond to customers, share and boost high interest content, and hopefully make some sales. You want to ensure that everything you say is reflective of your brand and that it is what your particular demographic set is interested in seeing. Take the time to do your research and every post that you make will bring you one step closer to being a social media savvy superstar.


Creating your business account isn’t difficult, but knowing just how to run it can be. When you’re dealing with social media, there is a lot of room for error and a lot of room for growth. Results don’t happen overnight, but that’s why we’re here to help!
Feel free to reach out to our 24/7 Digital Hotline and we will walk you through your best options for building up your social media presence effectively and sustainably.