A Step-by-Step Guide for Running a Facebook Ad Campaign

Facebook marketing is easy once you get the hang of it, but taking that first step can feel pretty overwhelming.
If you’ve decided that you’re in the right position to successfully market on Facebook, it’s time to jump in with both feet! With more than 2 billion users and an extensive toolbox of advertising services, Facebook’s Ad Manager is the perfect stepping stone along your journey to marketing super-stardom.
We put together a step-by-step guide to help you get started.
Facebook Ad Manager
When you’re ready to jump in to your Facebook ad campaign, you’ll navigate to Facebook’s native Ad Manager.
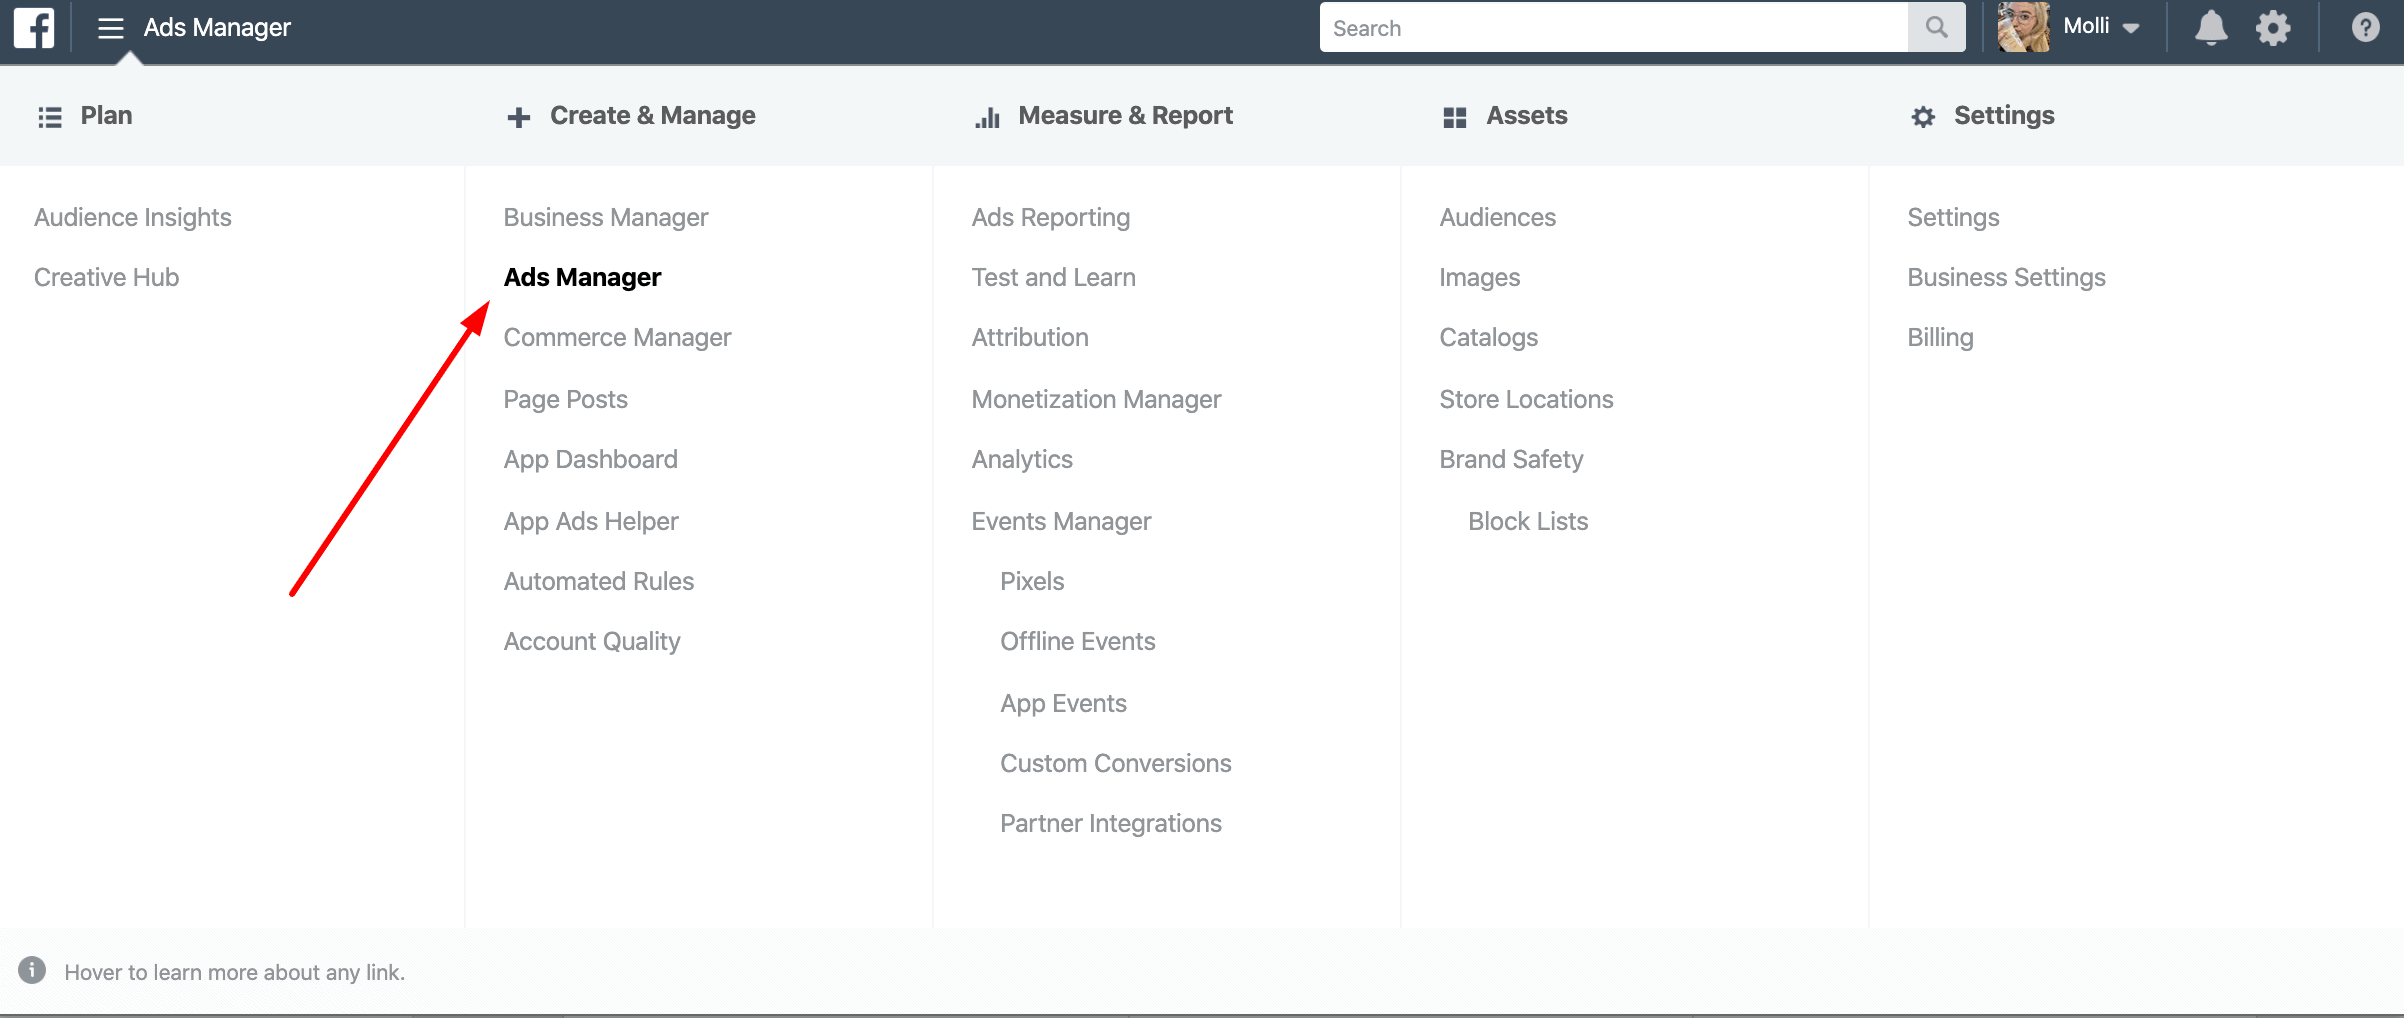
It’s a handy tool that lays out all of the settings you have for creating and targeting your ad… and believe us, there’s a lot of them.
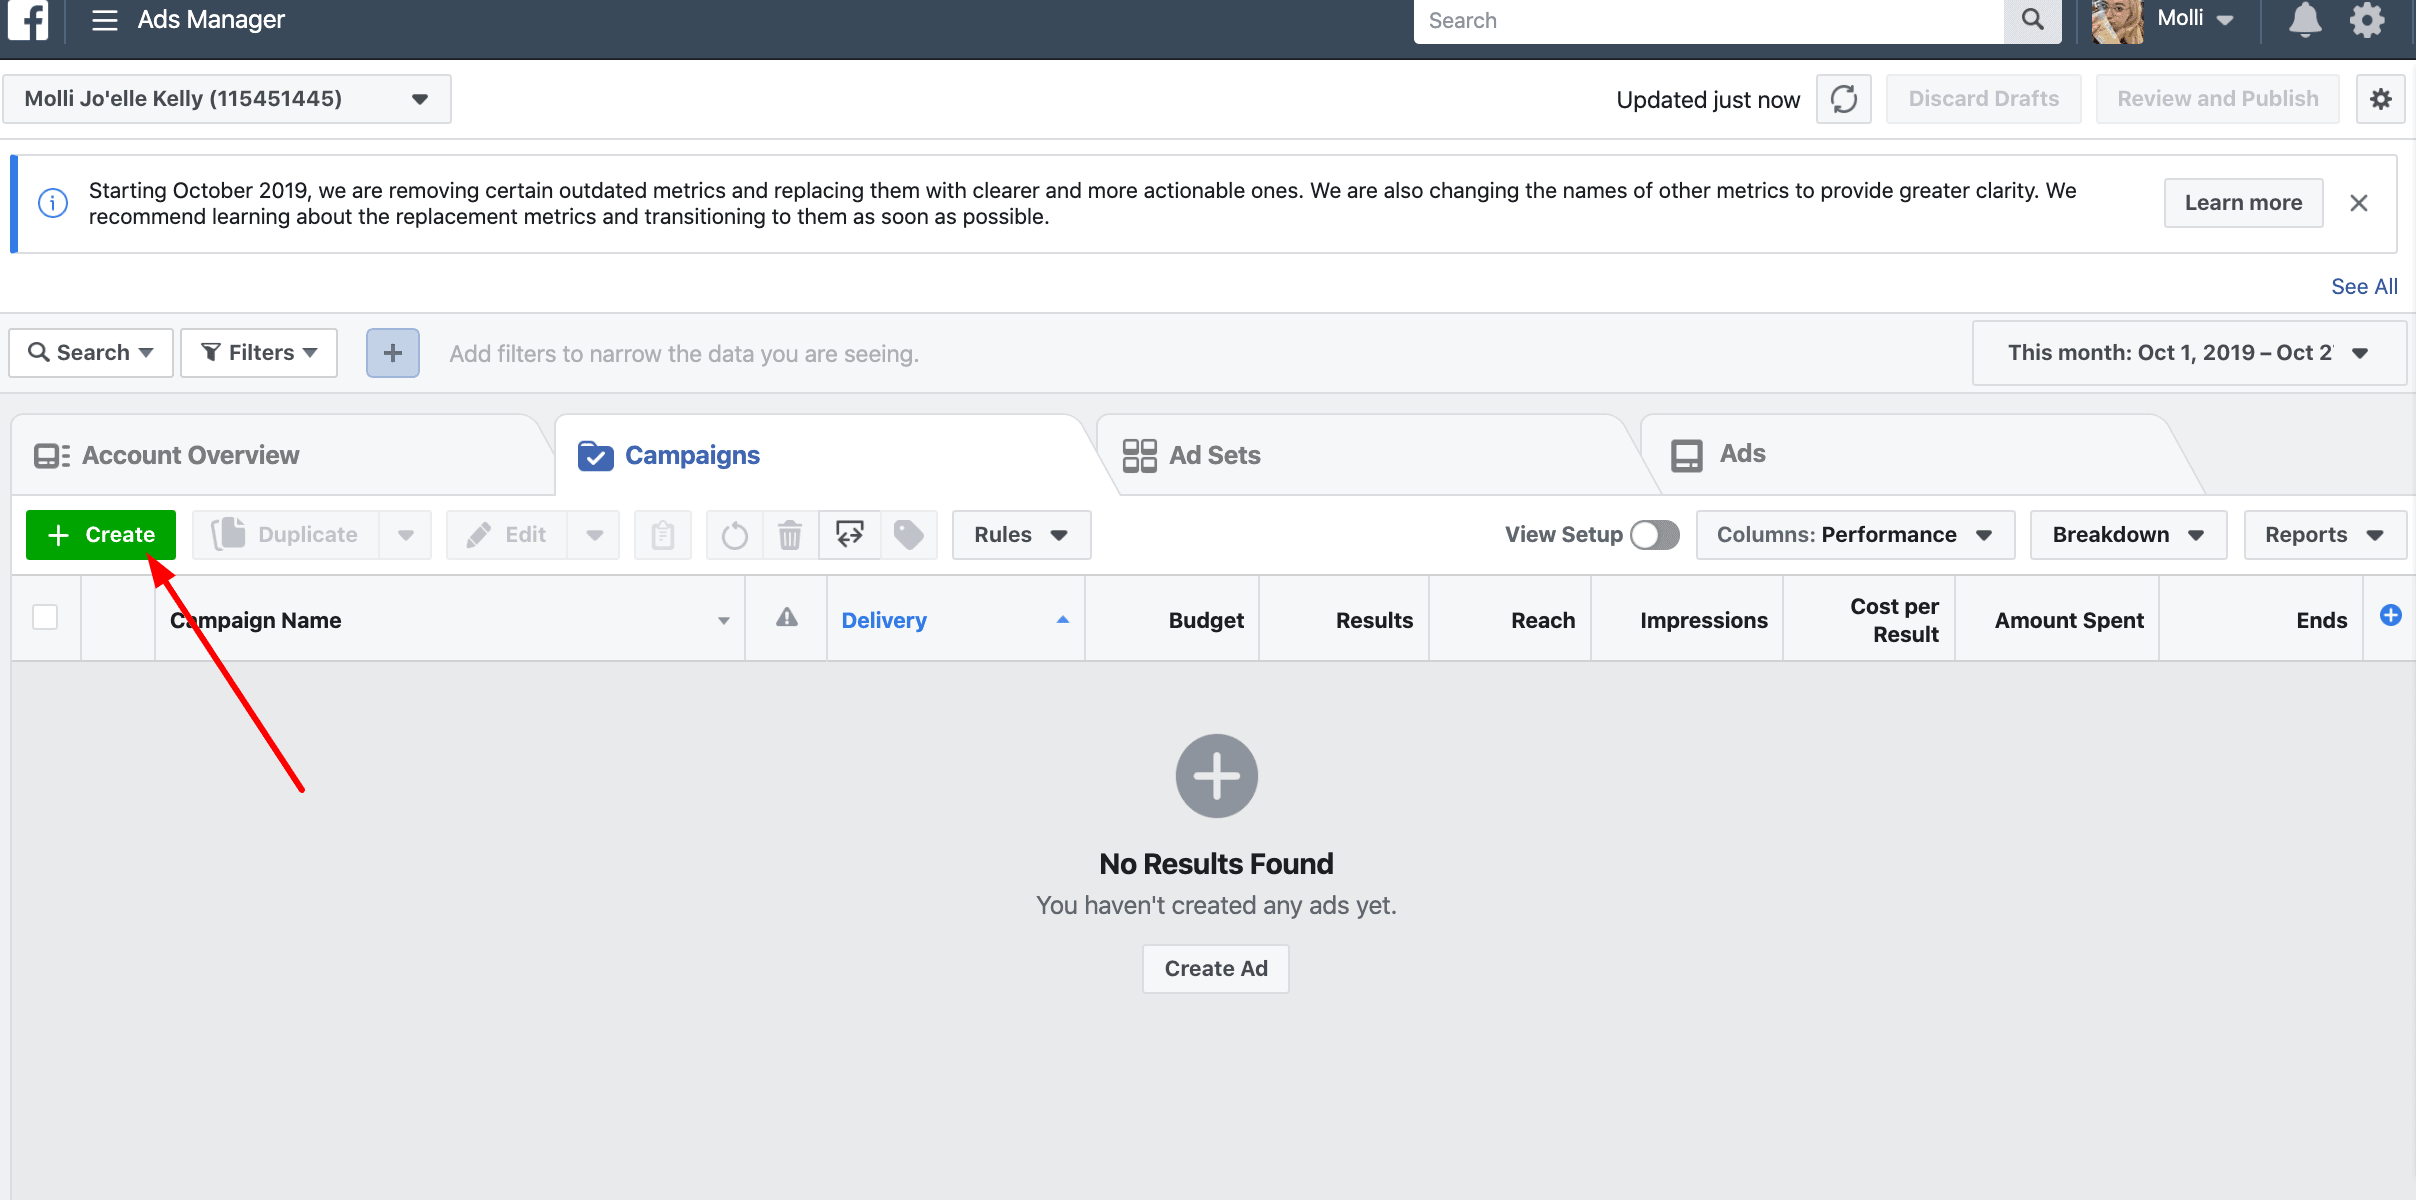
If you’ve never created an ad before, your Ad Manager will only have the option for you to create a new campaign. Hit the green “Create” button on your far left to start setting up your ad.
Once you’re up and running, you’ll be able to see compiled data about audience engagement and click through rates.
Step 1: Choose Your Objective
First, you’re going choose your objective. Basically, Facebook is asking you to designate what it is you want to accomplish by running the campaign. Once you’ve chosen an option, the program can give you tips and tools particular to your specific needs.
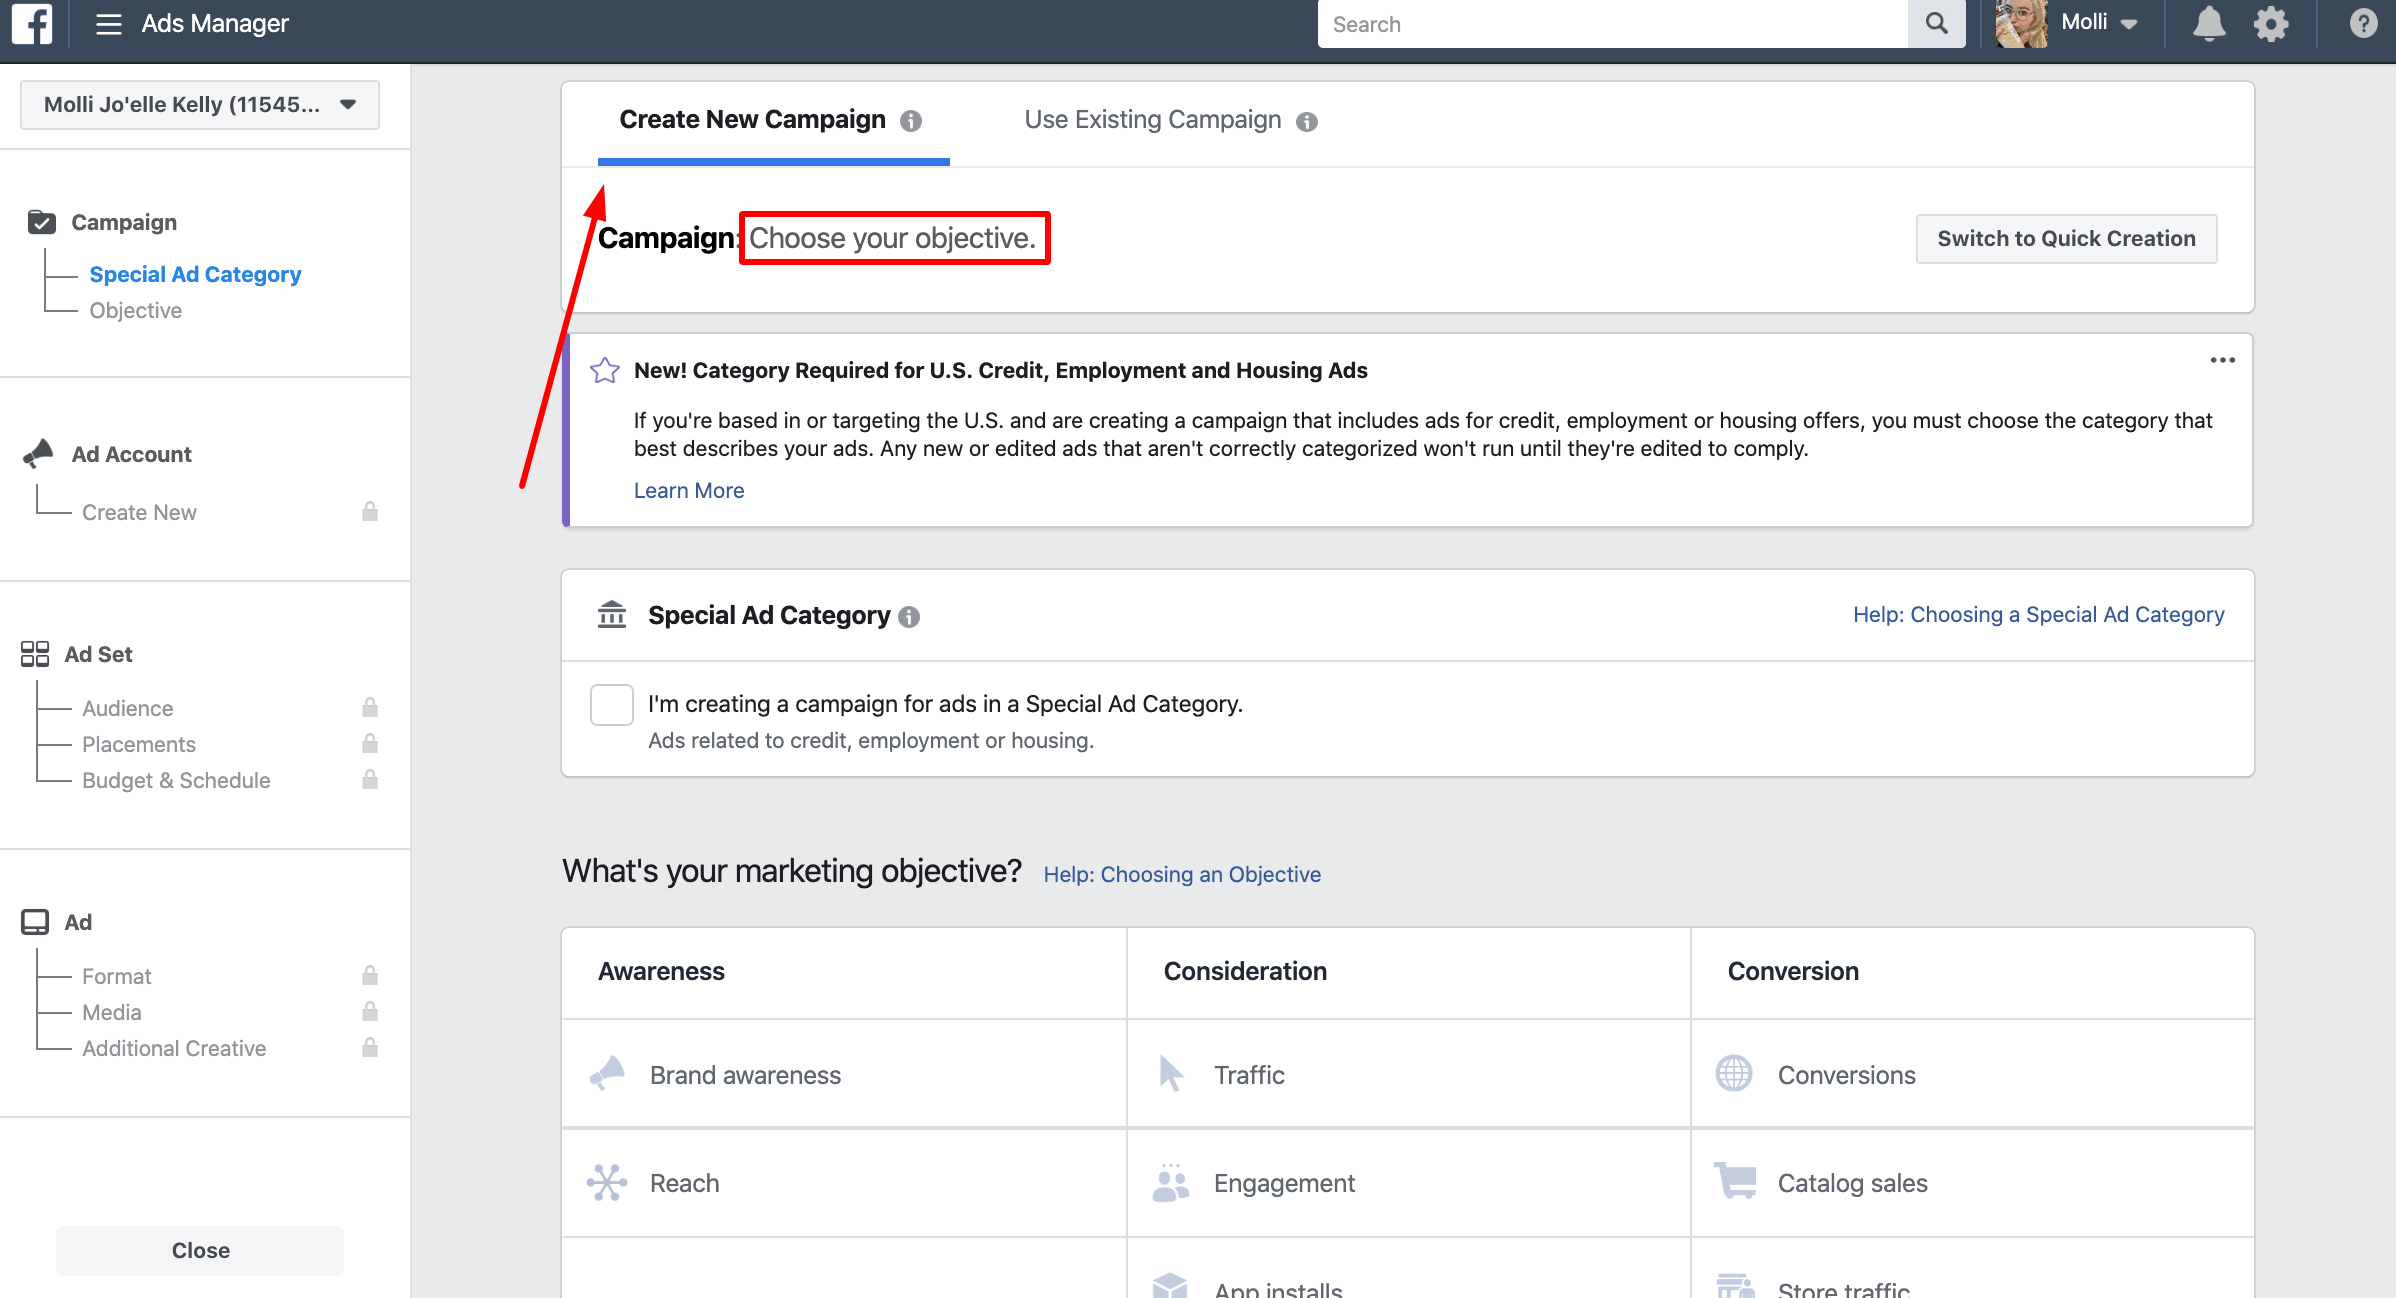
There are 11 different marketing objectives to choose from, including:
- Brand awareness
- Reach
- Traffic
- Engagement
- App installs
- Video views
- Lead generation
- Messages
- Conversions
- Catalog sales
- Store traffic
For our mock ad, we’ll choose brand awareness. It’s a good place to start because people need to be aware of your brand before they’re willing to buy your product.
Better yet, according to Moz, “If you just spend $1 per day on Facebook ads, you will get in front of 4,000 people that wouldn’t have seen you otherwise. If you are doing that and your competitors aren’t, you win the awareness game in your niche.”
Such a tiny investment for such a mega-awesome impact!
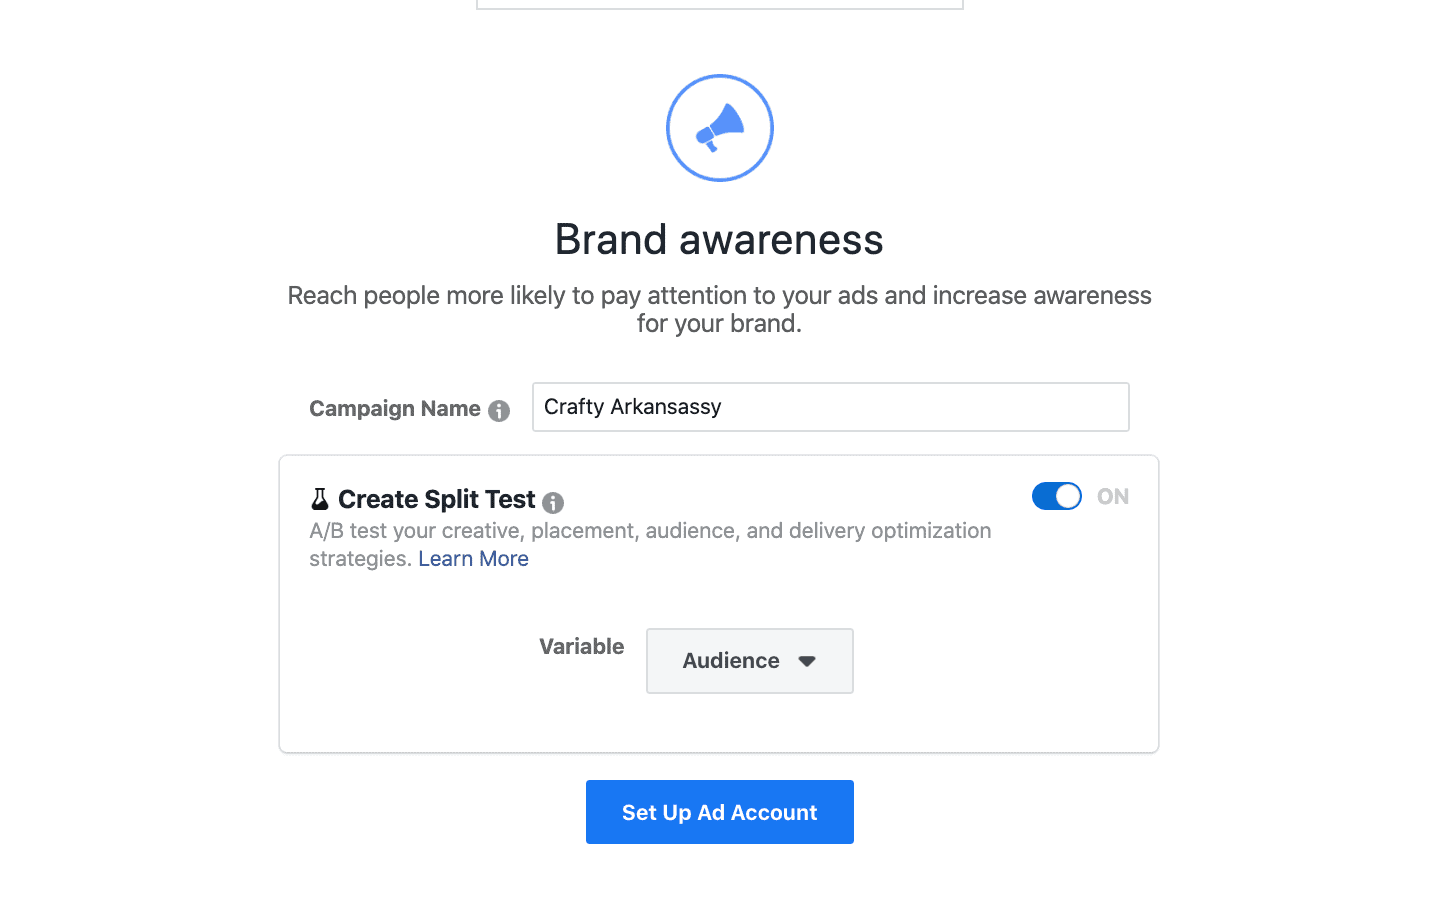
Once you’ve made your choice, Facebook will give you a couple of data-return and budget options for you to choose from, as well as a place to name your campaign.
The Split-Test option is a pretty cool way to experiment with your ads. You choose if you want to test creative (the ad content itself), audience, or placement. If you opt-in, Facebook will set up two sets of variables and return data about them at the end of the campaign.
For example, let’s say that you want to run a craft blog.
If you choose audience, you can put your ad in front of Audience A (elementary teachers) and Audience B (stay-at-home moms). Facebook will run your ads to those two specific demographics, then return data on who engaged with the ads the most.
To keep things simple for this tutorial, we’ll keep run the process without the split-test option.
Step 2: Create Your Audience
Next, you’ll define who exactly it is that you want to see your ads. Getting down to the nitty-gritty of your targeting goals is a whole other ball of wax that we’ll explore later this week, so for the sake of time, we’ll pretend that we’ve already undergone extensive research and created buyer personas to nail our perfect demographic.
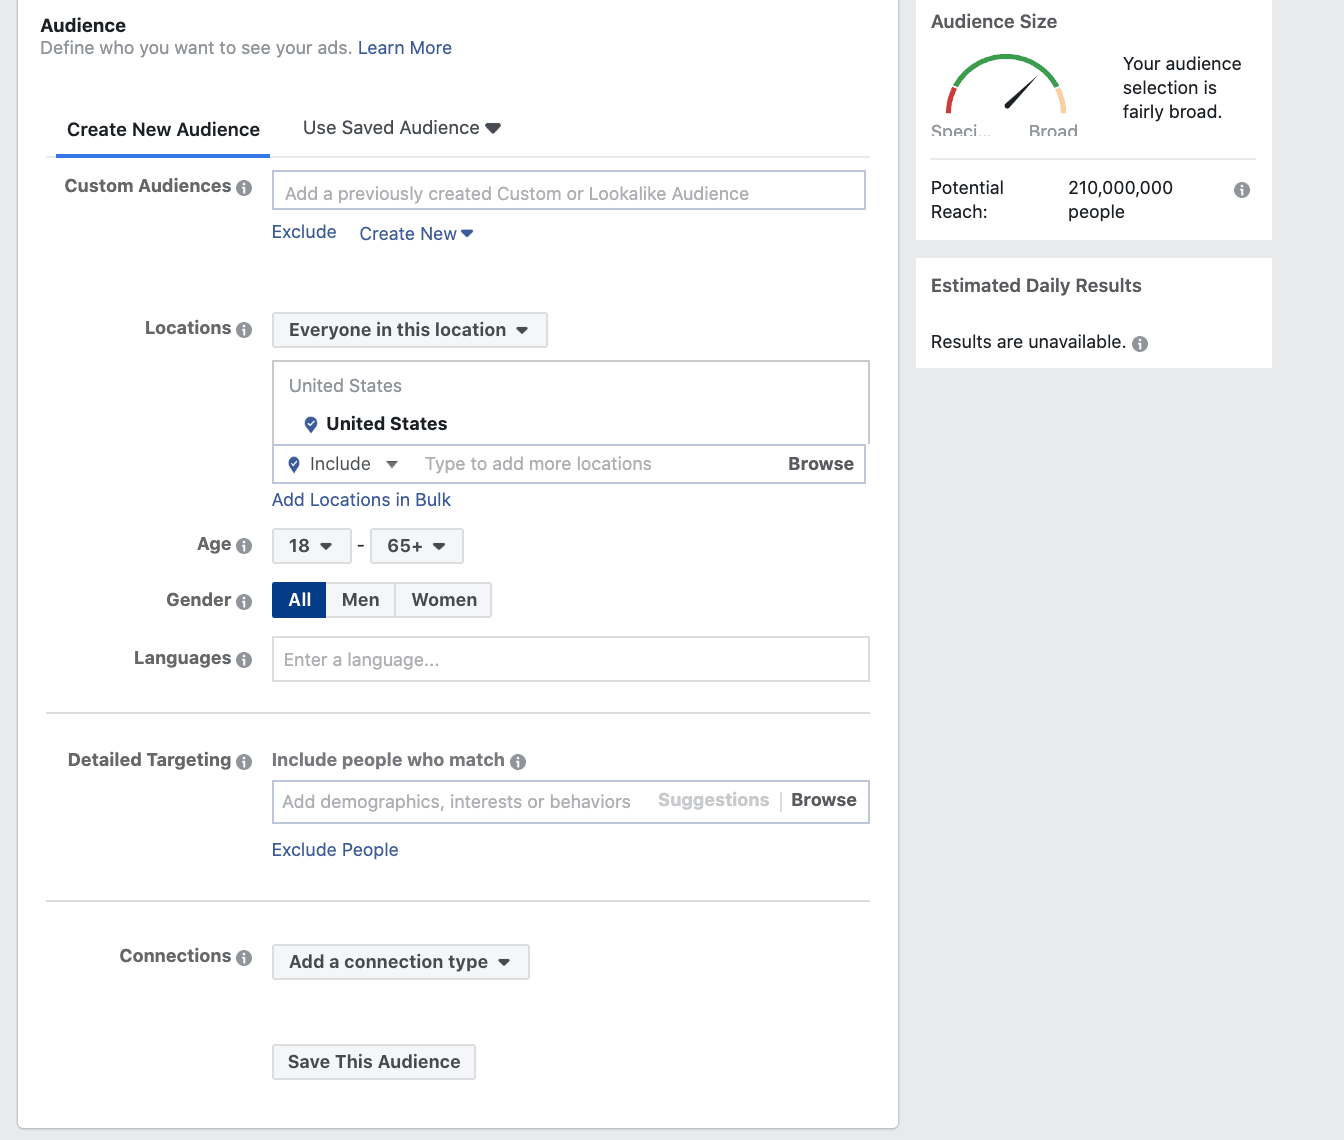
One decision you can make pretty quickly is how broad you want your campaign reach to be. If you’re offering a general product, or something that a wide swath of people would be interested in, you want your reach to be broad. If you’re dealing with something more niche, or you’re trying to drive a particular demographic towards your brand, a more narrow approach is the way to go.
Let’s hone in on some of the specifics of audience-building. There is an absolute plethora of built-in targeting categories… Like, way too many to list out here. Many of the main categories also include sub-categories, and some of those sub-categories have sub-sub-categories… You get the idea.
We can narrow it down to some major players, though:
- Location
- Age
- Gender
- Languages
- Relationship
- Education
- Work
- Financials
- Home
- Ethnic Affinity
- Generation
- Parents
- Life Events
- Politics (U.S)
- Interests
- Behaviors
- Connections
- Remarketing
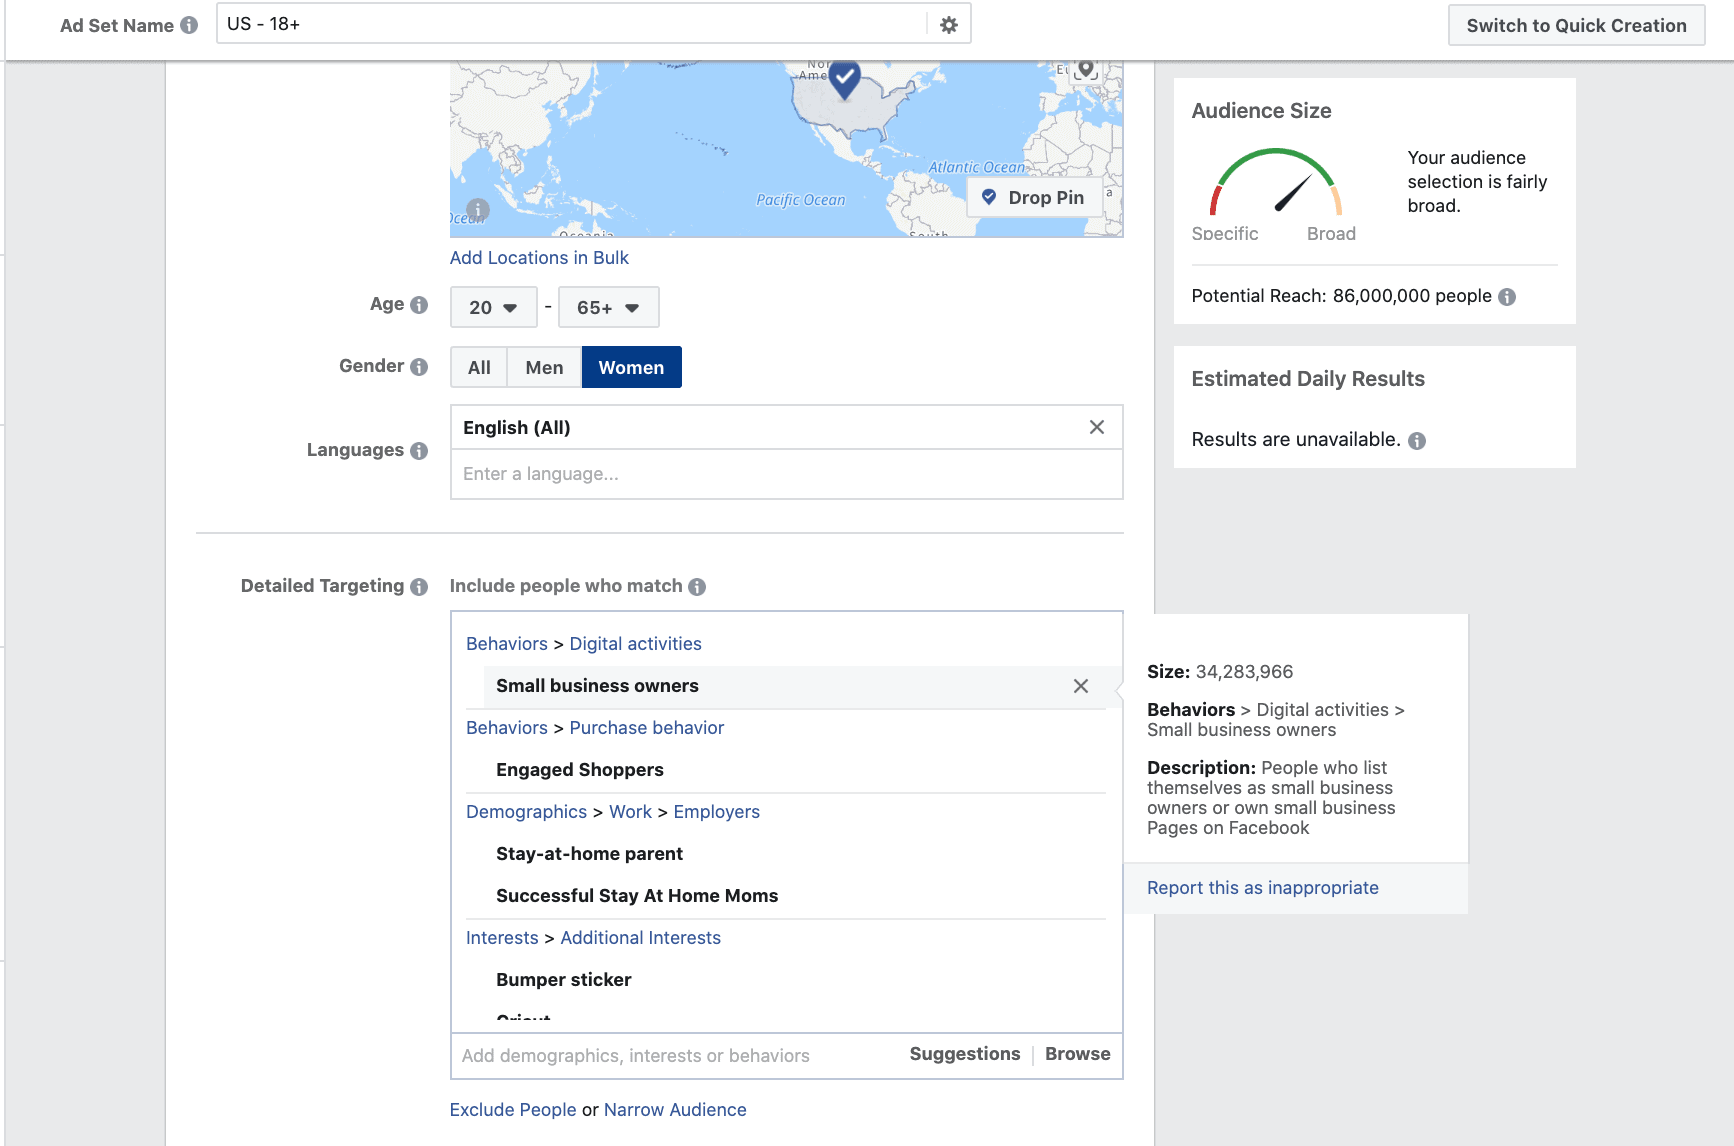
What’s really cool about all of those options is that you can seriously target people who you know want to buy your product and avoid wasting advertising money on people who don’t.
For this crafting blog example, we’ll target women across the United States over the age of 20 who speak English.
In the detailed targeting section, you can really run away with your specificities. I like to use this infographic to help me narrow down my topics.
Step 3: Budget
One really cool feature of the Ad Manager is the Budget Tool. It helps you stay firmly in control of how your advertising dollars are being spent, while still taking advantage of opportunities to extend your reach.
When you’re choosing your budget, you can either set a per diem expense or a lifetime expense. Using your choice, the ad program will do the most it can do with how much you’re willing to pay.
So, if you choose a per-day expense, Facebook might charge you $1.25 one day if a placement opportunity arises or $0.75 if it’s a slow news day. When it’s all said and done, though, you’ll still only pay an average of $1.00 a day.
For the lifetime budget option, you’re putting more power into the Ad Manager’s hands, but it’s hunting down prime real estate to give you the most bang for your buck. If you plug $7.00 into your budget, it might be gone in a day, but you can rest assured that around the same number of people saw it as if you’d run the ad on a 7-day per diem.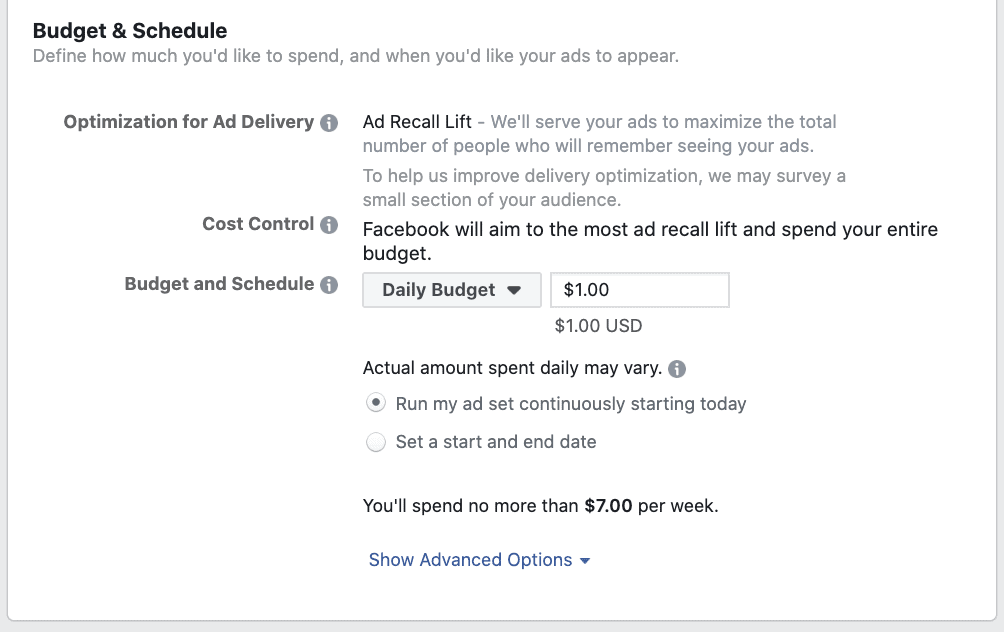
Step 4: Schedule
This part’s pretty self-explanatory. You can decide when you want your ad. to run, down to the hour. We briefly touched on demographic research in regards to time (marketing to morning commuters from 6:00 am to 9:00 am, for example), but you can use any number of resources to help you decide when to post.
According to Hubspot, the best time to post is on Thursdays and Fridays from 1:00 pm to 3:00 pm. CoSchedule says it’s 1:00 pm to 4:00 pm Thursday-Sunday. The best way to decide for yourself is to try a few different days and hours combinations until you find the one that’s returning the best results.
Step 5: Decide How You Want Your Ad to Appear
Hopefully before we got to this point, you’ve already designed your ad. If not, stop reading this. Go design your ad. Creating your campaign right now is like trying to cook soup without a pot. We’ll wait for you to get back…
Great job! I bet it looks amazing!
Facebook has a couple of options for the way that you want your ad to appear on people’s Newsfeed.
Link ads are a single page with a Call to Action button for your audience to click. This option is most appropriate if your original objective was relevant to people leaving the site to complete an action, like store traffic or app installs.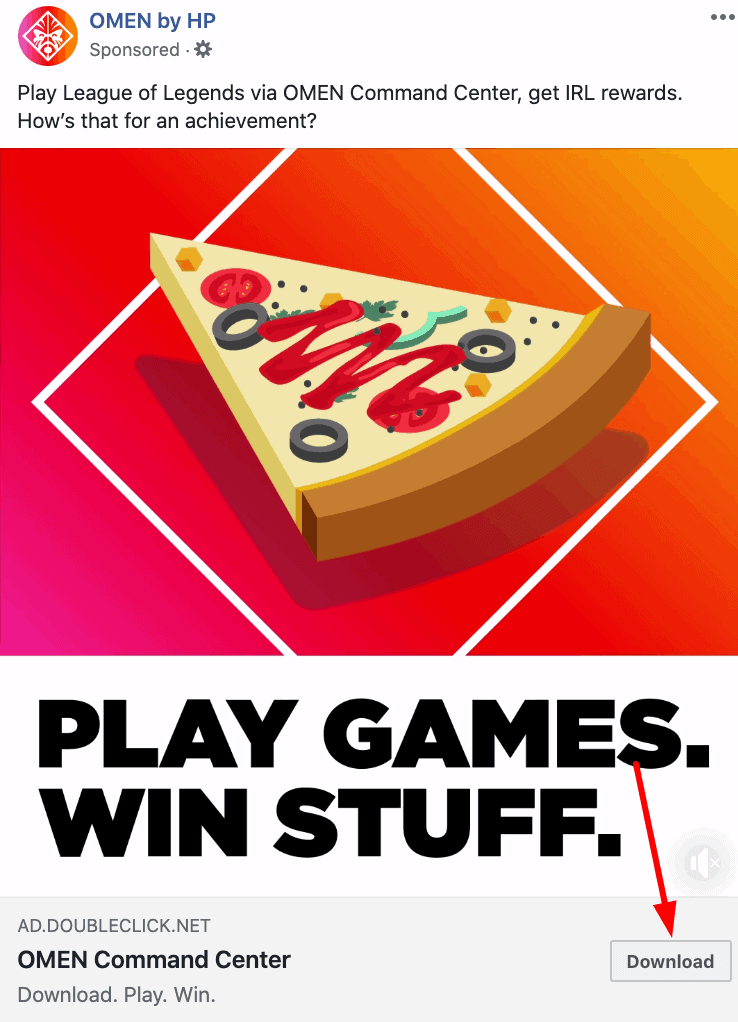
Facebook recommends that link ads meet the following recommendations:
- .jpg or .png
- 1.91:1 to 4:5 image ratio
- Highest resolution image available
- Less than 20% text in the image
- Up to 125 characters
Carousel ads also include a Call to Action, but they can contain up to 5 images at no additional cost. These are perfect for brand awareness campaigns because they compel people to click through them to see the rest of the images. Even if the person viewing the ad doesn’t buy your product, they definitely made a cognizant connection to your brand.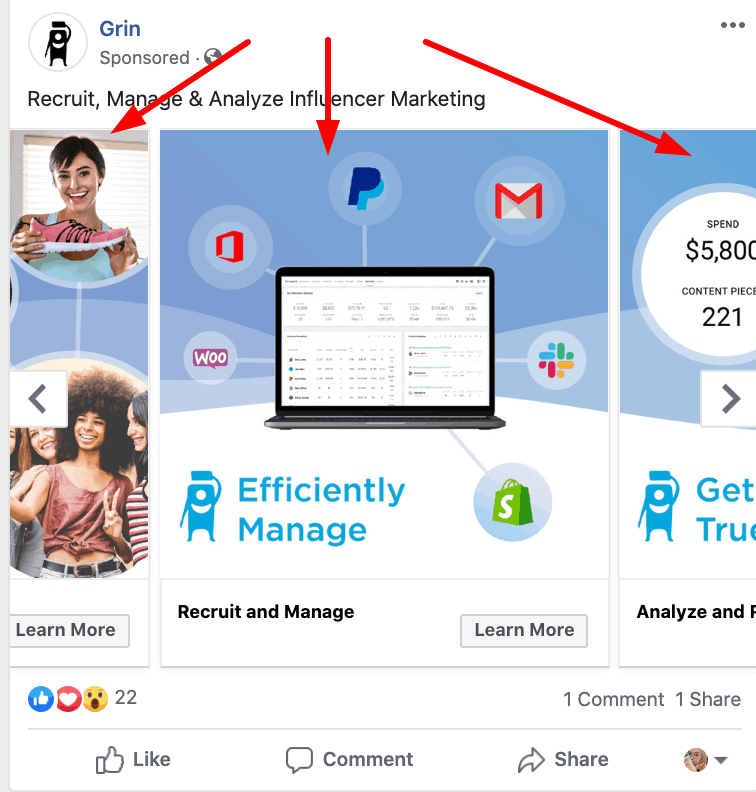
For a carousel ad, you’ll want to ensure that you meet these criteria:
- 1080 x 1080 image size
- 1:1 image ratio
- Up to 125 characters for main text
- Up to 40 characters for headline
- Up to 20 characters for link description
In terms of placement, you’ve got quite a few options. Facebook lets you post your ads in Newsfeed, Stories, Instant Articles, Marketplace, or Messenger Stories.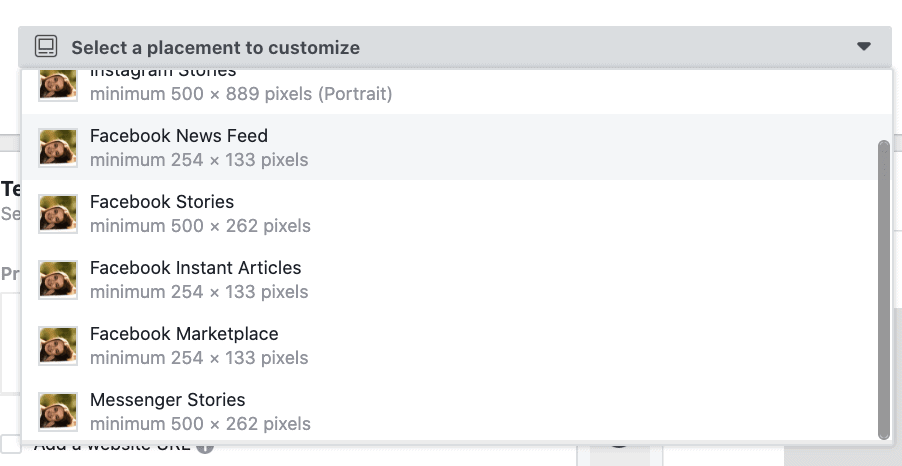
Once you’re done, all that’s left is to hit “Confirm.”
Look at you, you official ad manager!
Go Forth and Advertise!
In terms of placement, you’ve got quite a few options. Facebook lets you post your ads in Newsfeed, Stories, Instant Articles, Marketplace, or Messenger Stories.
So, you’ve got your first ad campaign up and running. It’s time to kick back and let the profits pour in…
Just kidding.
You’ve got to monitor and adjust! As your ads run, data is going to pour in from a ton of sources: who’s clicking your videos, what demographics are following your links, what locations are sharing your posts. The key to your success is disaggregating the data and pulling out the nuggets of success. If your ads are being opening most by the 35-45 crowd, hone in and hit that demographic again. There’s no wrong answer except trying to push the same ad campaign unsuccessfully over and over.
Facebook Ad Manager makes it easy to fail forward, offering inexpensive advertising options to any sectors of the more than 2 billion people who use the site. Keep plugging away until you find something that sticks.
Don’t forget to check back later this week for our strategy guide for growing your Facebook audience. Later down the line, you can also find our guides for marketing on Instagram and Twitter. Now, get out there and build your first campaign!